


Windows Resource Protection Found Corrupt Files: 5 Fixes


An SFC scan on Windows can fix many system stability issues, but what if you get a Windows Resource Protection found corrupt files error? Try these fixes.
If you’re running Windows, you can use the System File Checker (SFC) tool to fix many buggy operating system issues. For example, running an SFC scan can help to detect corrupt system files and replace the files with working ones.
You can use it to fix Windows 11 crashing, fix a keyboard not working, or spot (and possibly resolve) other issues. For example, if you see a Windows Resource Protection found corrupt files error message like the one shown below, you’ll know you’ve got a problem.


The error indicates that SFC found corrupt system files but it couldn’t replace the files with working ones. After receiving the error, you have a few options to repair your PC.
Here’s a look at five ways to fix the Windows Resource Protection found corrupt files error.
1. Run a DISM Scan if SFC Can’t Repair Corrupt Files
When running an SFC scan, it will replace corrupt files with known working ones. However, System File Checker may not have the correct files to replace the corrupt ones.
Instead, you can run a Deployment Image System Management (DISM) scan, which will check Windows servers to replace damaged files.
To run a DISM scan, use the following steps:
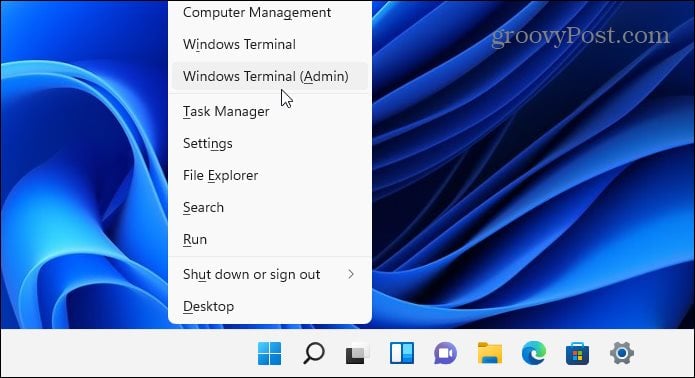
- Right-click the Start button and select Windows Terminal (Admin) from the menu.
- Enter the following command in the terminal and hit Enter:
DISM /Online /Cleanup-Image /RestoreHealth
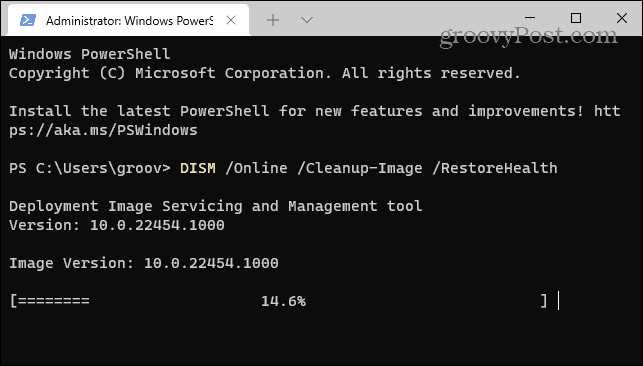


Note that it can take a while for the scan to run, and it isn’t uncommon for it to appear stuck at 20 percent. Don’t close the terminal window until the scan completes.
After the scan completes, rerun an SFC scan to see if you still receive the error.
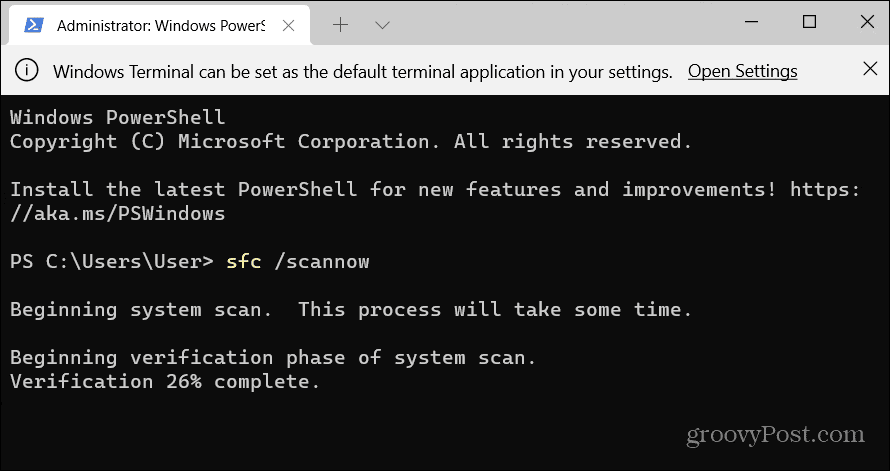

2. Run SFC Scan in Safe Mode
The Windows Resource Protection found corrupt files error could be due to OS processes and services running. Starting Windows in Safe Mode only loads only the minimum drivers and services to boot. After booting into Safe Mode, you can then run an SFC Scan.
Note: If you’re not on Windows 11 yet, you can boot Windows 10 in Safe mode.
To boot Windows 11 into Safe Mode, do the following:
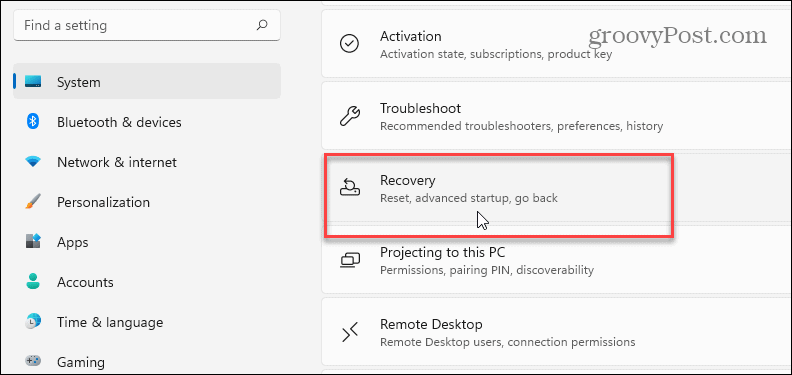
- Click the Start button or hit the Windows key and head to Start > Settings > System > Recovery.
- Scroll down the menu and click the Restart now button next to the Advanced startup option.

- Click the Restart now button when the verification message pops up.

- Your computer will boot into the Windows recovery environment, and from there, you want to go to Troubleshoot > Advanced Options > Startup Settings. Choose Enable Safe Mode with Command Prompt.

- Now that you’re in Safe Mode launch the terminal as admin and run an SFC scan.
sfc /scannow


3. Uninstall Windows Updates
If you receive the Windows Resource Protection found corrupt files error after a Windows update, it could be buggy and conflicting with other system files. In that case, you can uninstall the cumulative update.
To uninstall a Windows Update, use the following steps:
- Open Start > Settings and click on Windows Update at the bottom-left corner of the menu.
- Under the More options section, click on Update history from the list.
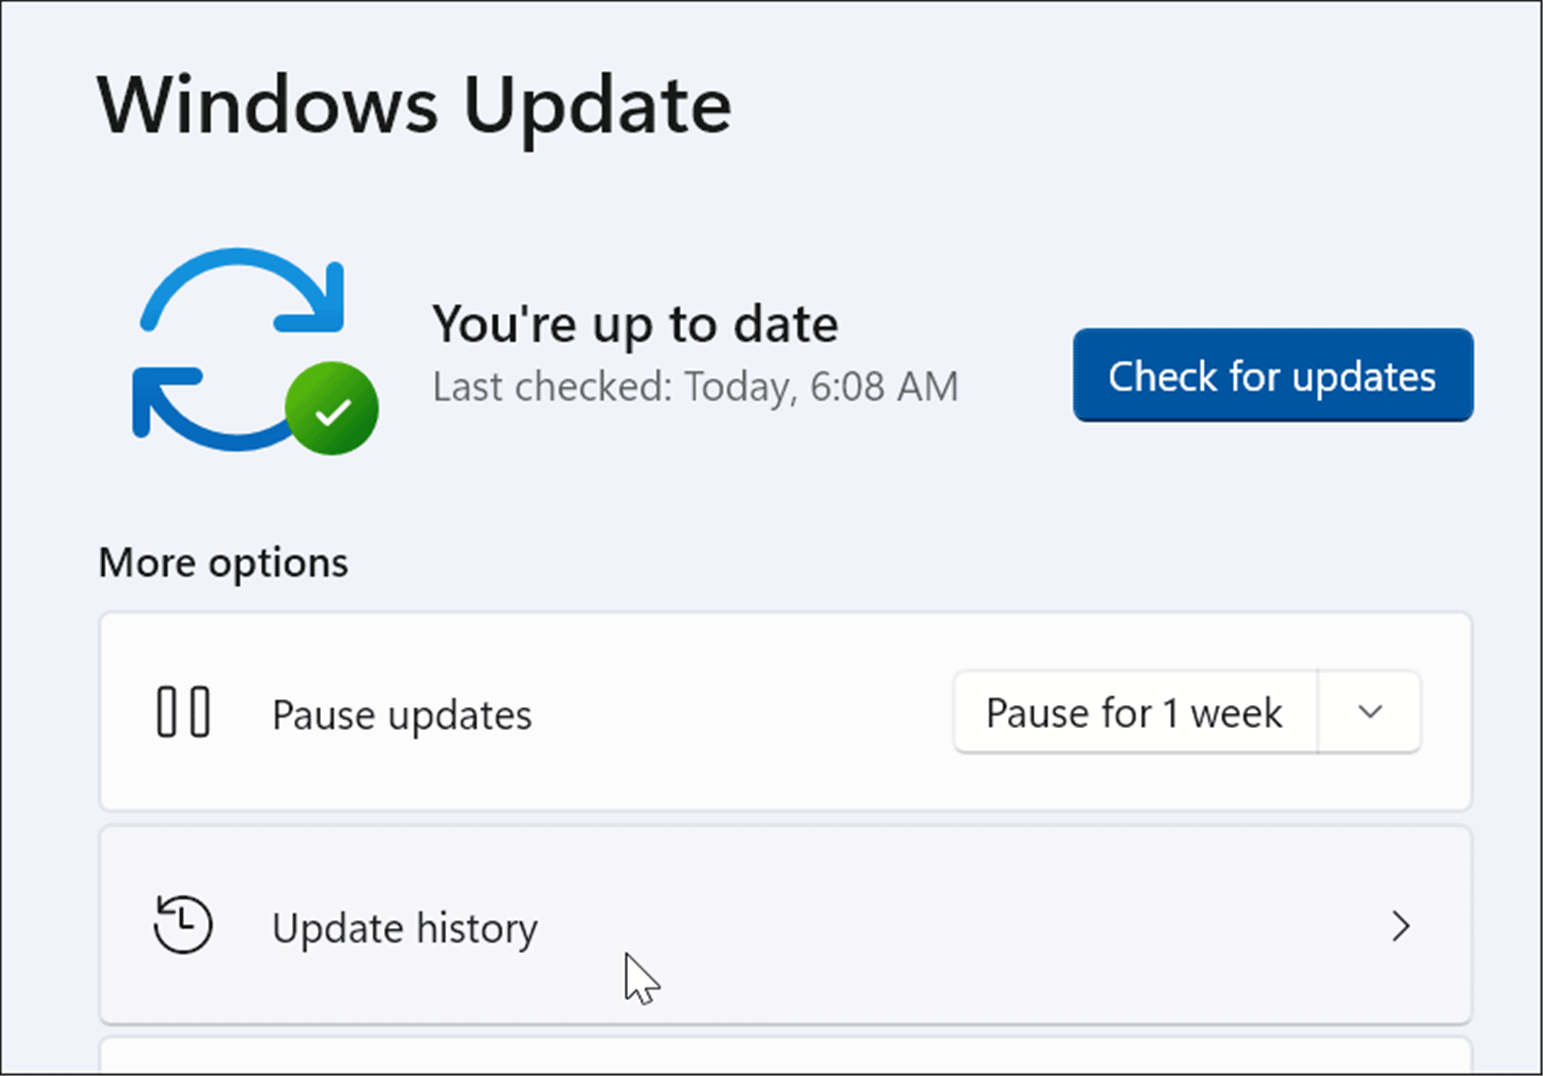
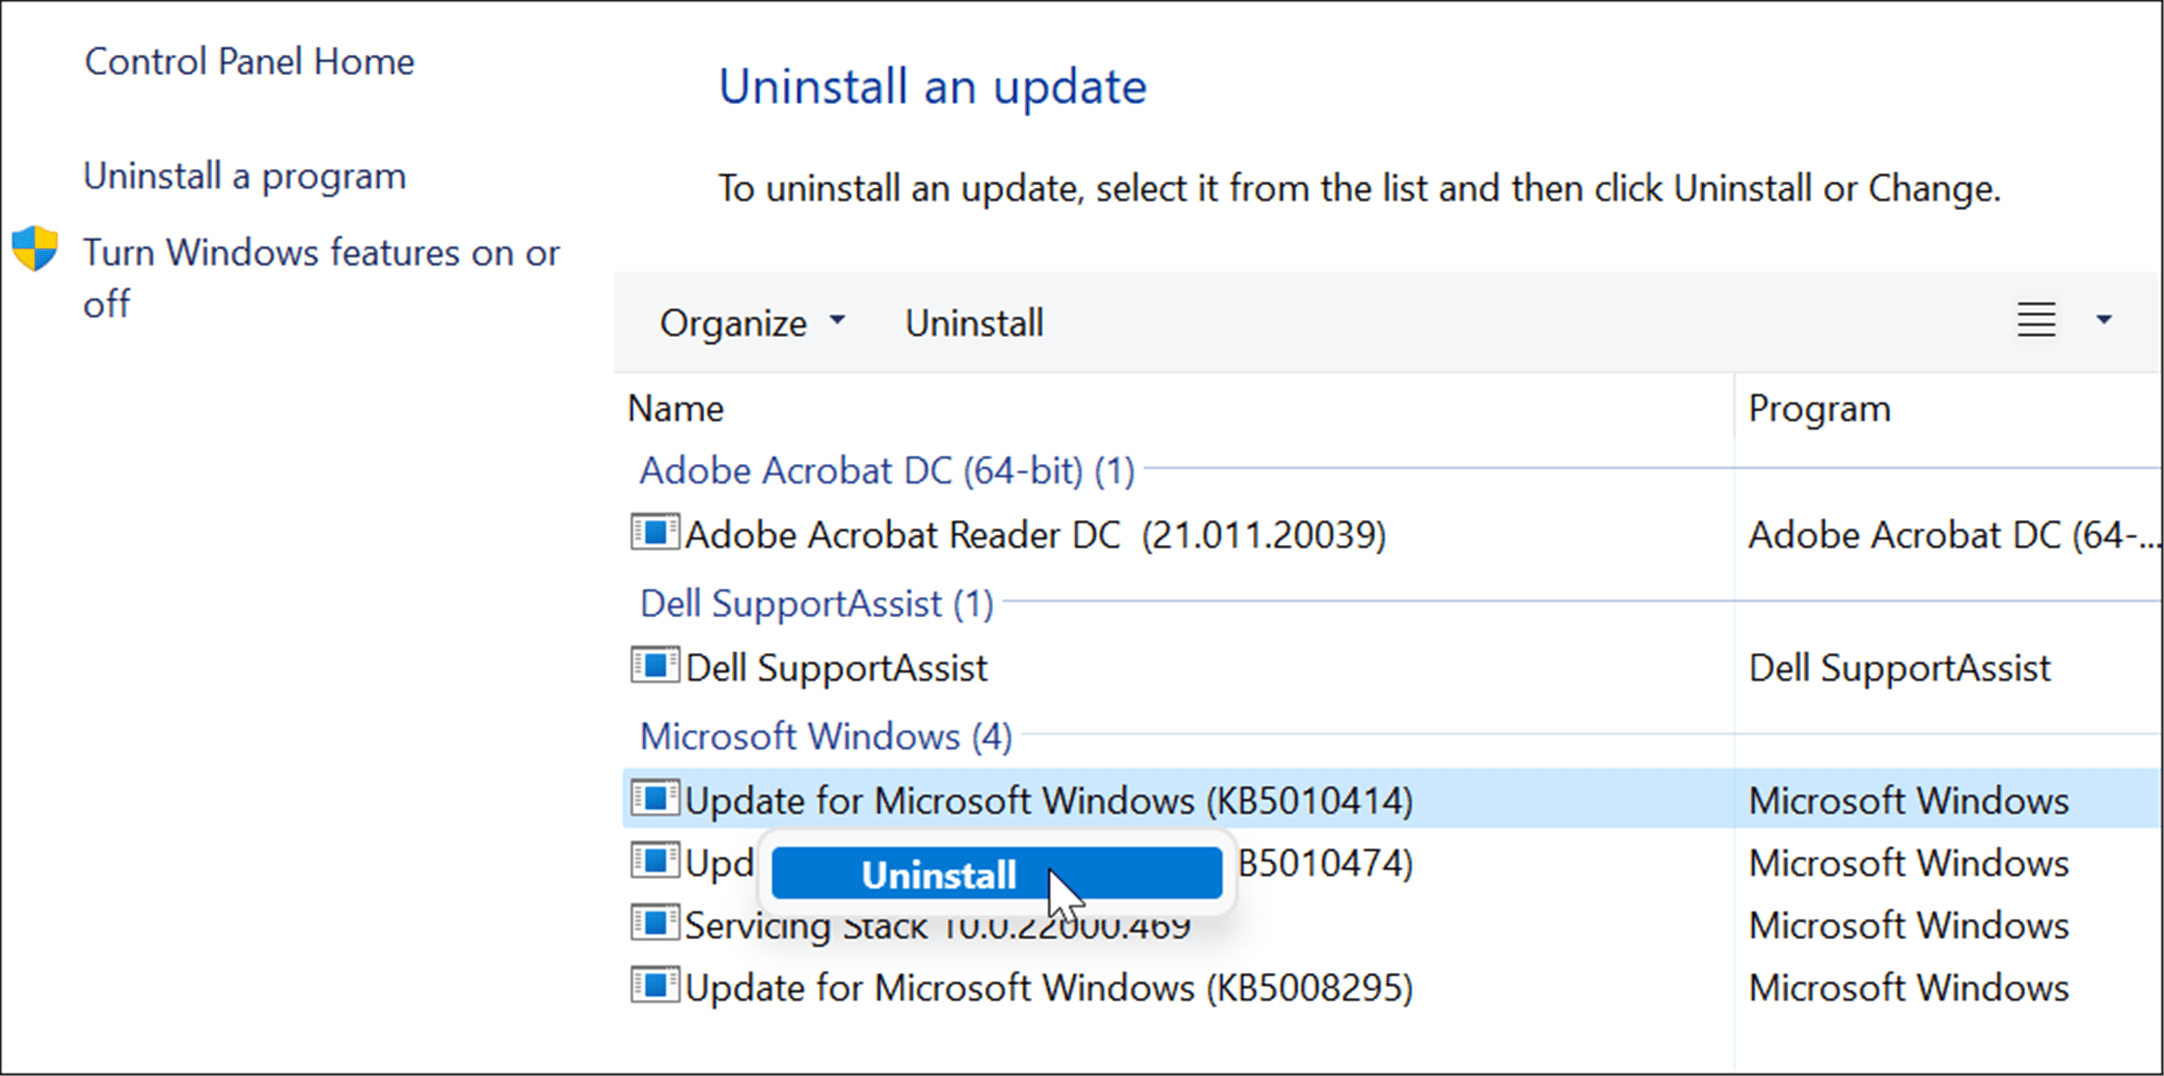
- Scroll down the list to the Related settings section and click on Uninstall updates.

- Right-click the troublesome update and select Uninstall and click Yes when the verification message appears.


After the update uninstalls, restart your system, and rerun the SFC scan to see if it fixes the error.
4. Use a Restore Point
If the SFC and DISM scans still aren’t helping, you can recover your PC from a system restore point – provided you have one.
To rollback OS changes and get your PC functioning again, use the following steps:
- Hit the Windows key, type restore point, and choose the Create a restore point option from the top result.

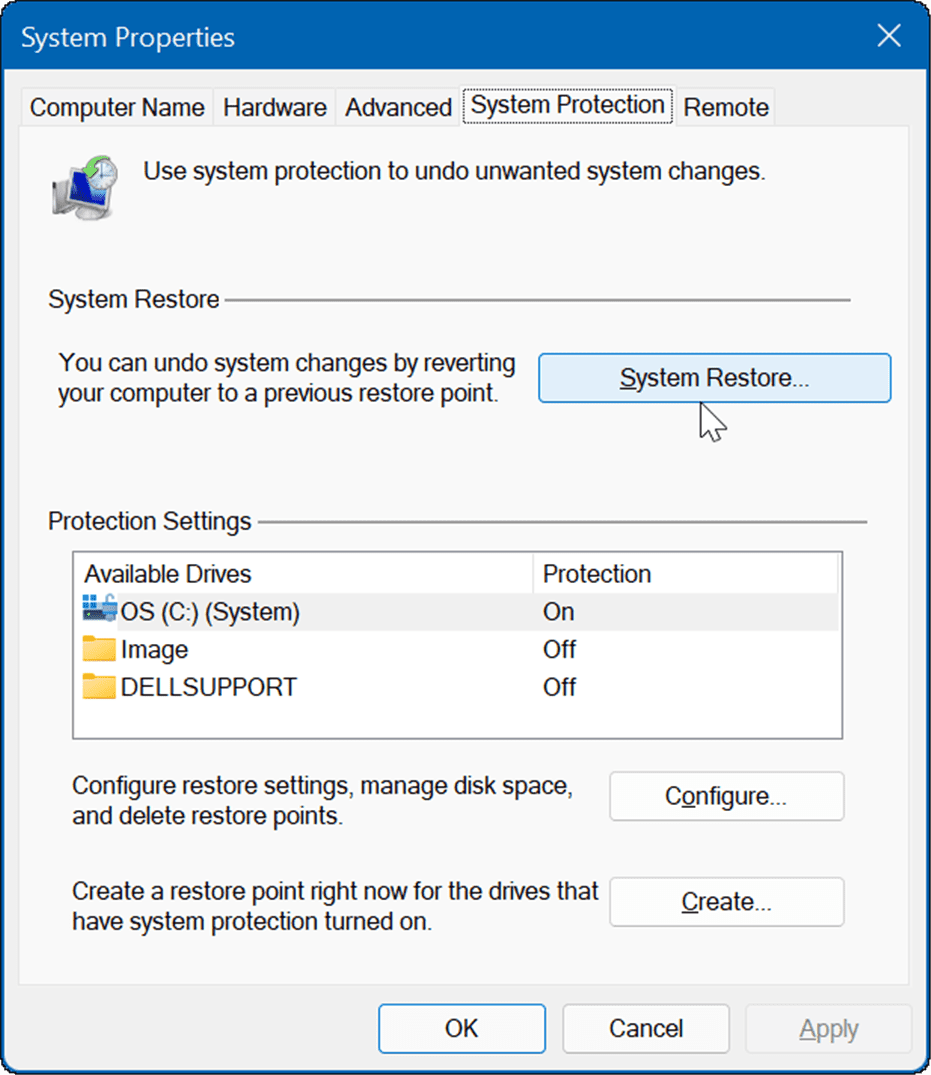
- From the System Properties window, click the System Restore button.
- Navigate through the on-screen wizard and choose the restore point you want and click Next.

- Once you have the restore point you want to revert to selected, click the Finish button.


Your system will reboot, and the restore point utility will apply the changes and return your PC to a working state.
5. Reset Your PC
If you’re still getting the Windows Resource Protection found corrupt files error, you can go a step further and reset your PC. Note that a PC reset is a “nuclear option,” and it will remove your apps. Also, your personal files could be lost during the process, so back up your PC first.
To reset your PC, do the following:
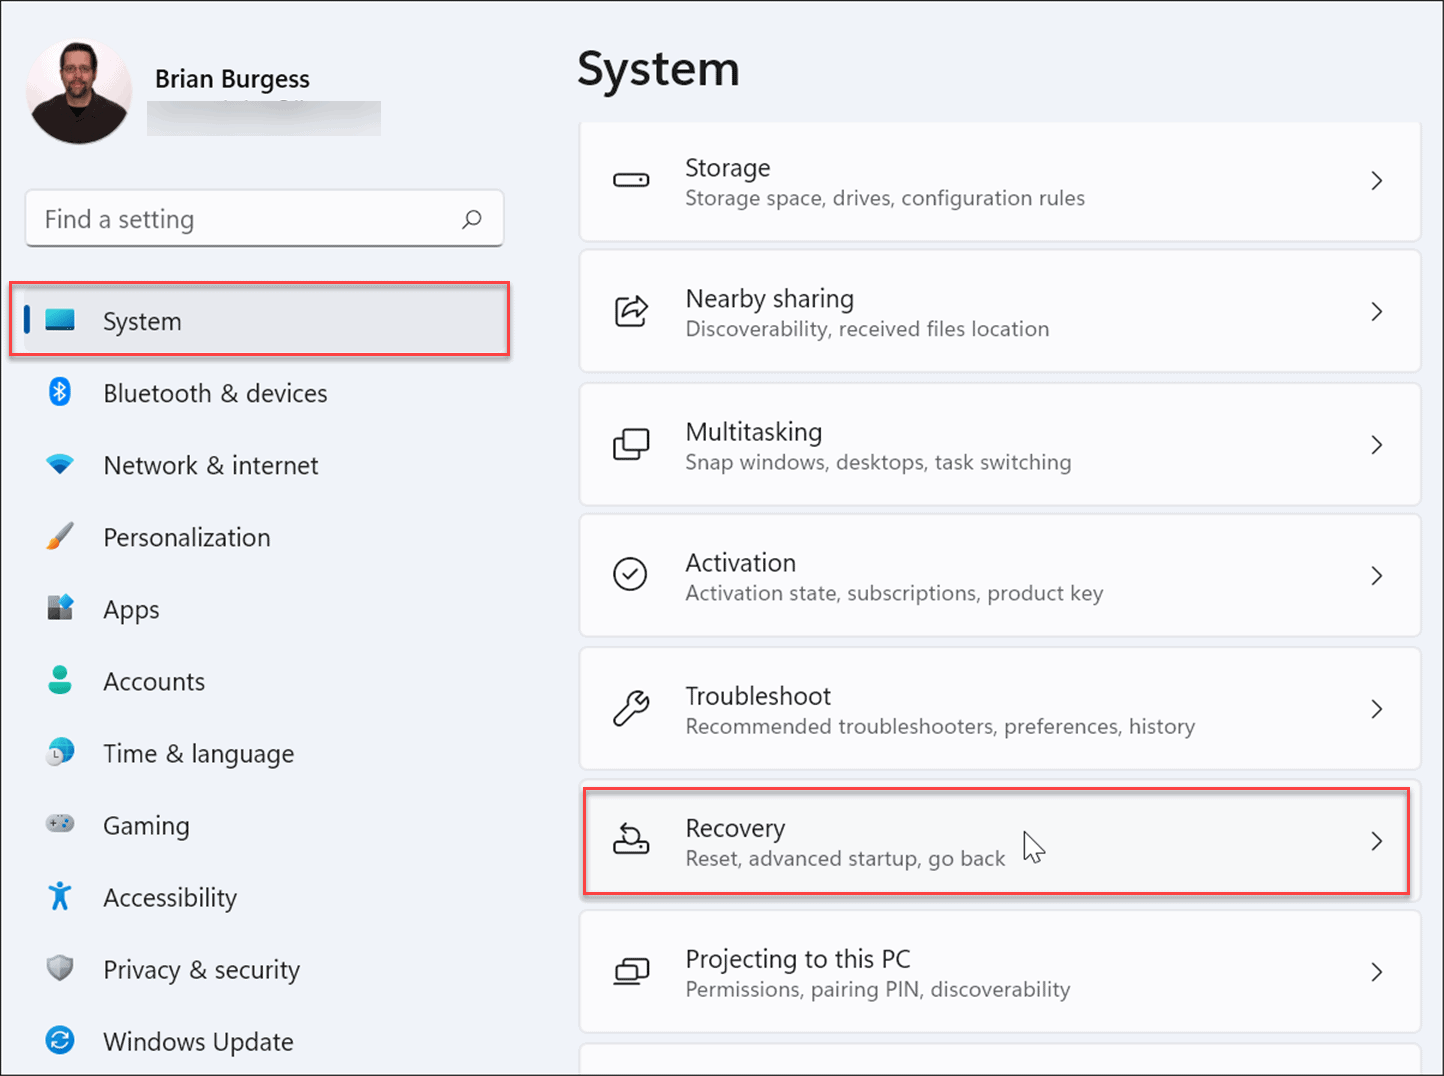
- Open Start > Settings and open System.
- Scroll down to the Recovery options.
- On the following screen, click the Reset PC button.
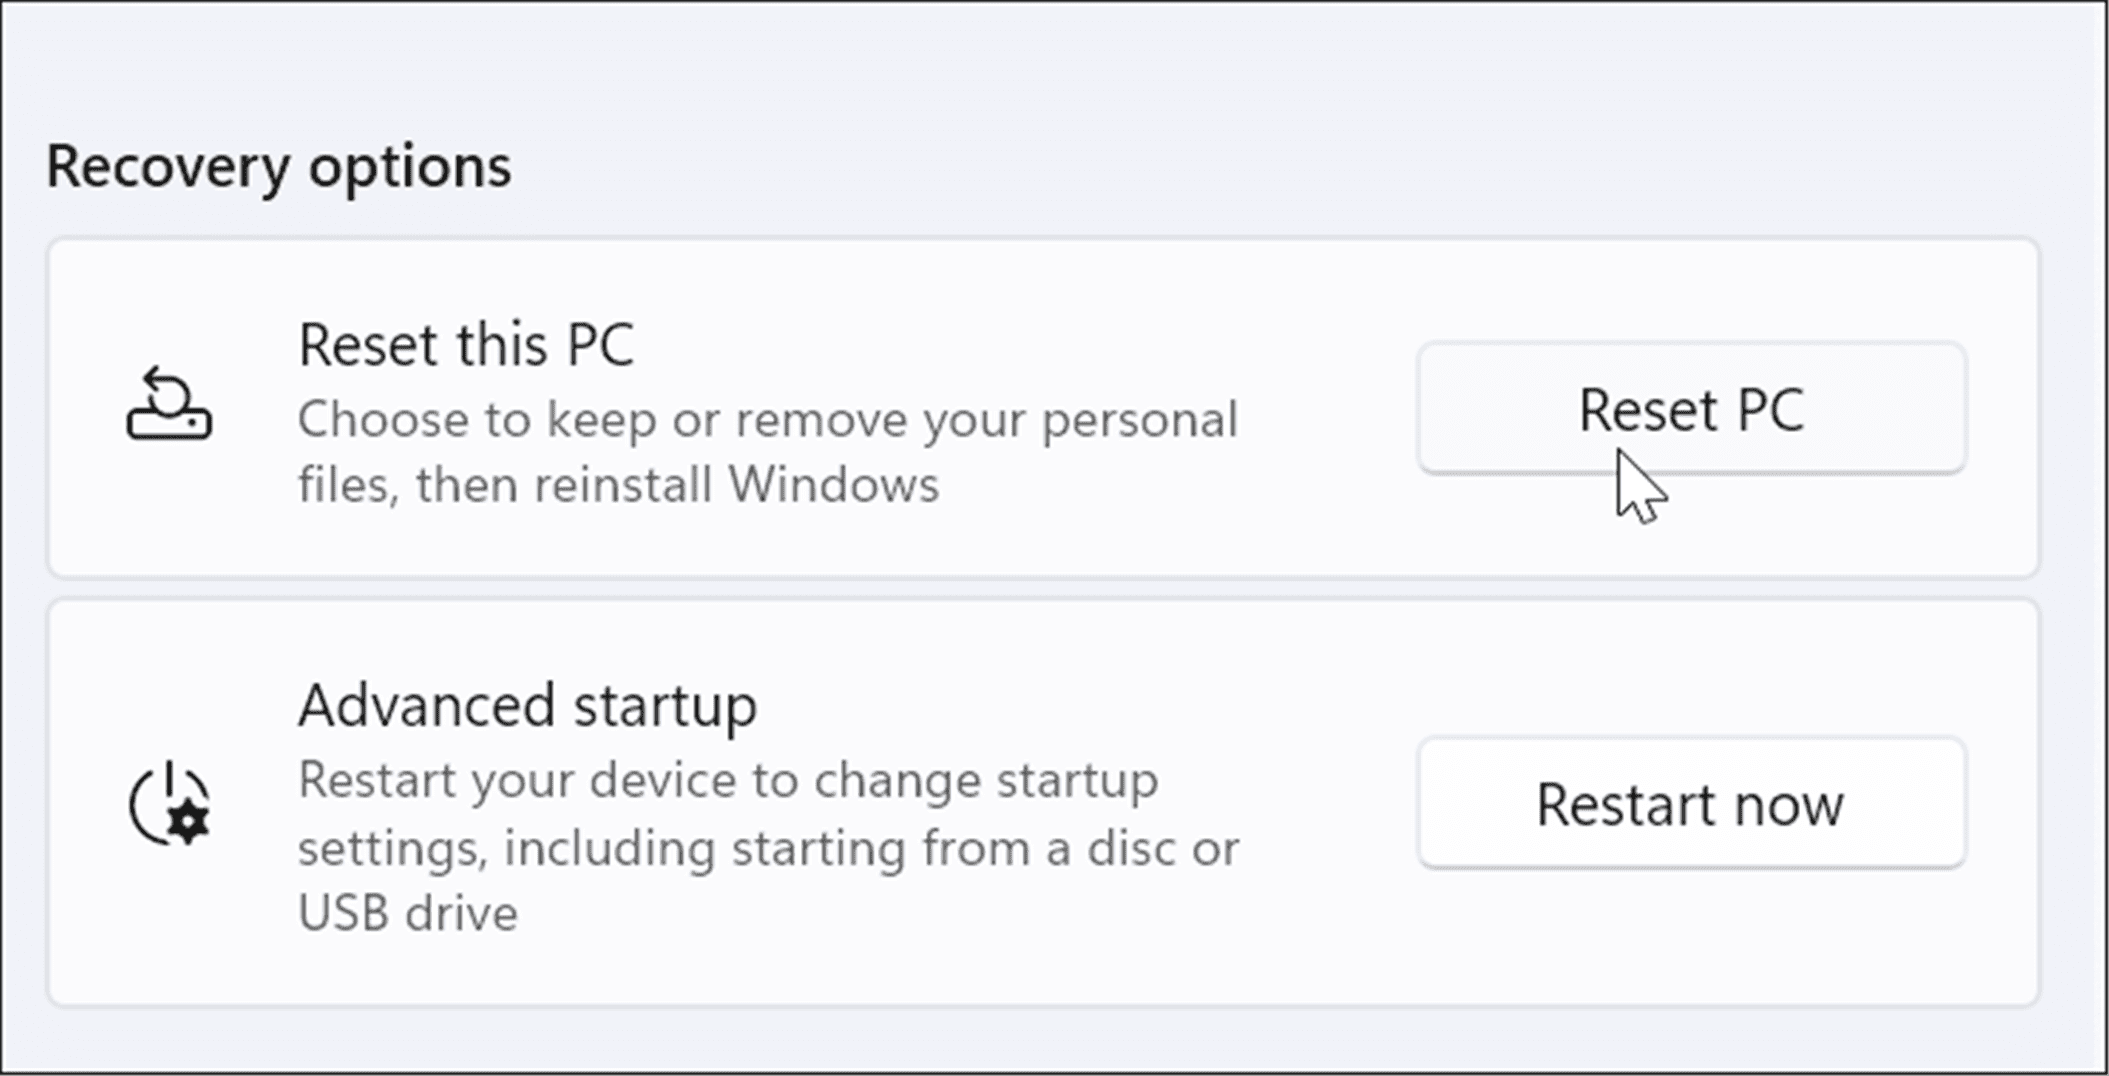
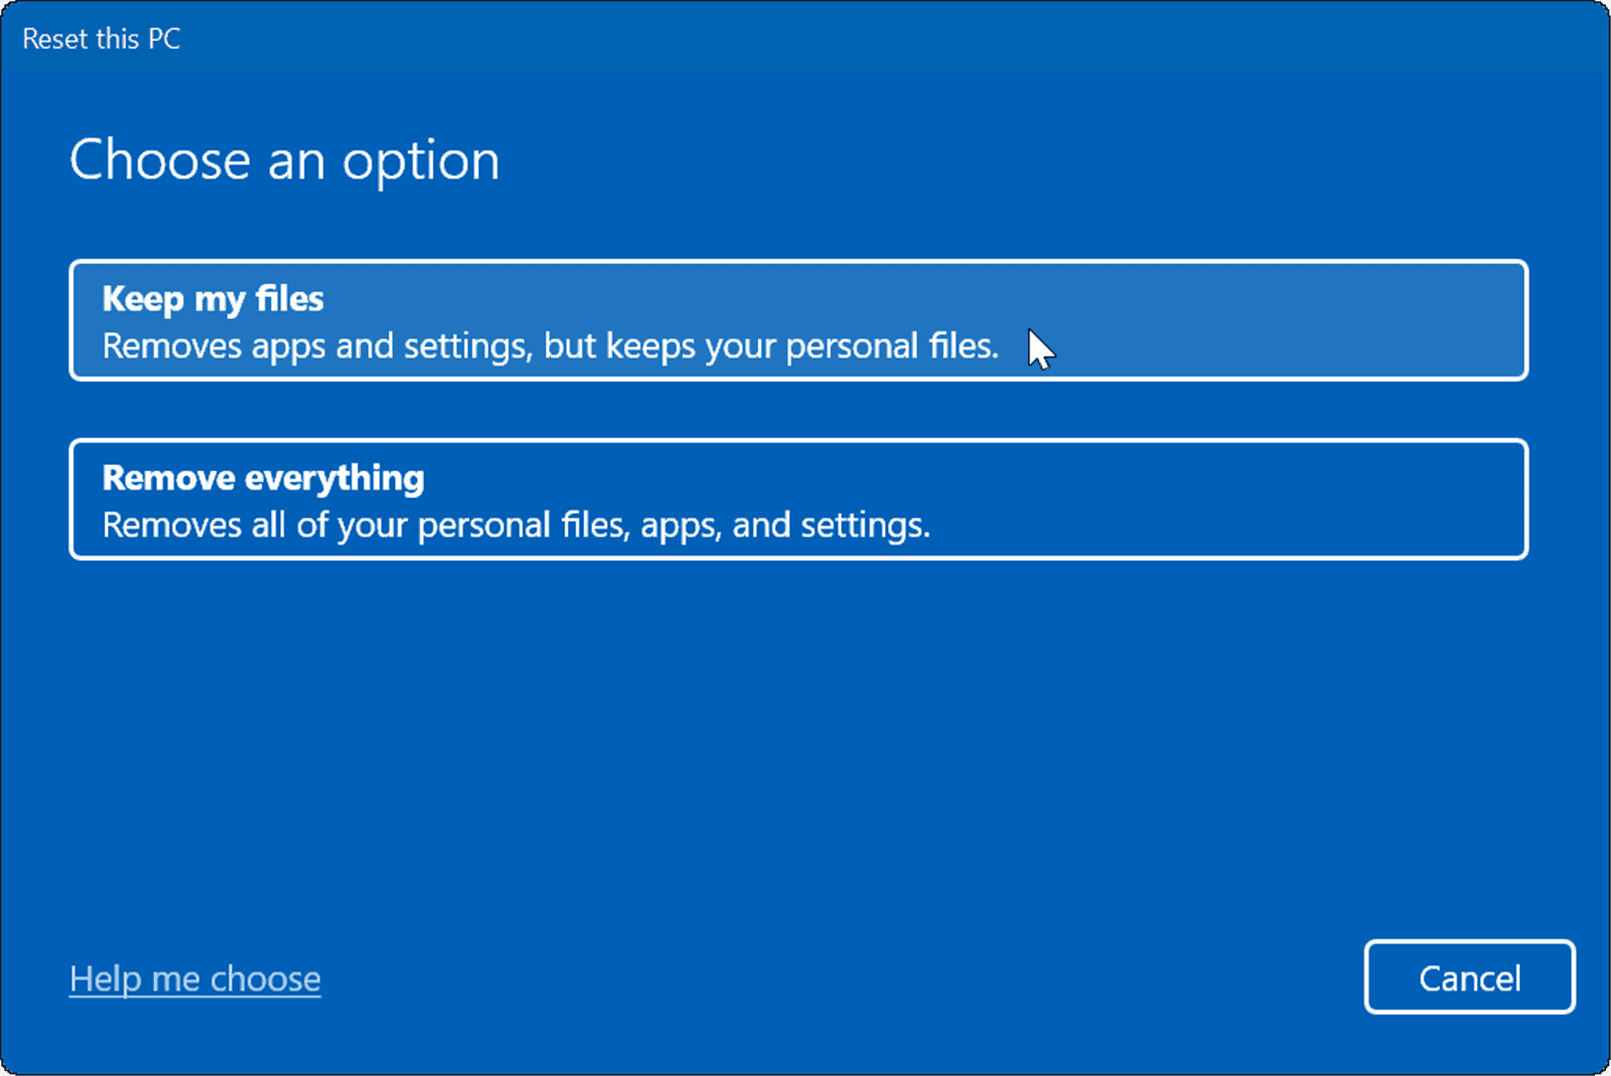
- Now, choose to keep your files and settings or remove everything and reinstall windows.
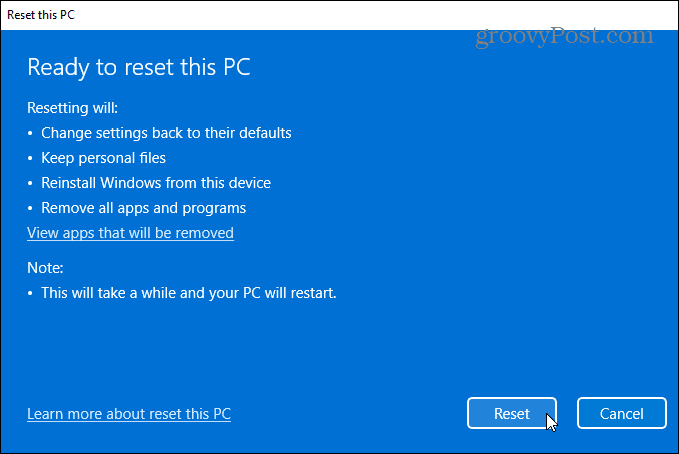
- Follow the on-screen instructions and wait while the reset process completes. Of course, your PC will reboot during the process.


If resetting your PC still doesn’t work, you can always perform a clean installation of Windows.
Fixing Corrupt System Files on Windows
Microsoft has come a long way in providing a well-built and stable operating system. Having corrupt system files isn’t as common as in the early days, like Windows 98, for example, but it can still be an issue. If corrupt files are found during an SFC scan, running a DISM scan will often fix it. However, you might have to take more drastic actions like a reset or complete reinstall.
The SFC and DISM utilities can fix many issues on Windows like Microsoft Teams not loading or Windows 11 not working after an update. It’s not just for software issues, either. For example, you can use the scan to fix USB not working or HDMI not working on your PC.
