Windows 11 PC Shutting Down For No Reason? Here’s How to Fix It
Occasionally your Windows 11 system can run into random shutdown issues. Common contributing factors to this problem include high CPU temperature, temporary glitches, incorrect power configuration, and critical system malfunctions.
Outlined below are a few troubleshooting steps to help you find and fix the random shutdown problem in Windows 11.
1. Run the Power Troubleshooter
Windows 11 features a built-in power troubleshooter. It will scan and find problems with your computer’s power settings. You can also allow it to change your computer’s power plan to a more efficient setting.
To run Windows 11 power troubleshooter:
- Press Win + I to open Settings.
- In the System tab, scroll down and click on Troubleshoot.
- Next, click on Other troubleshooters.
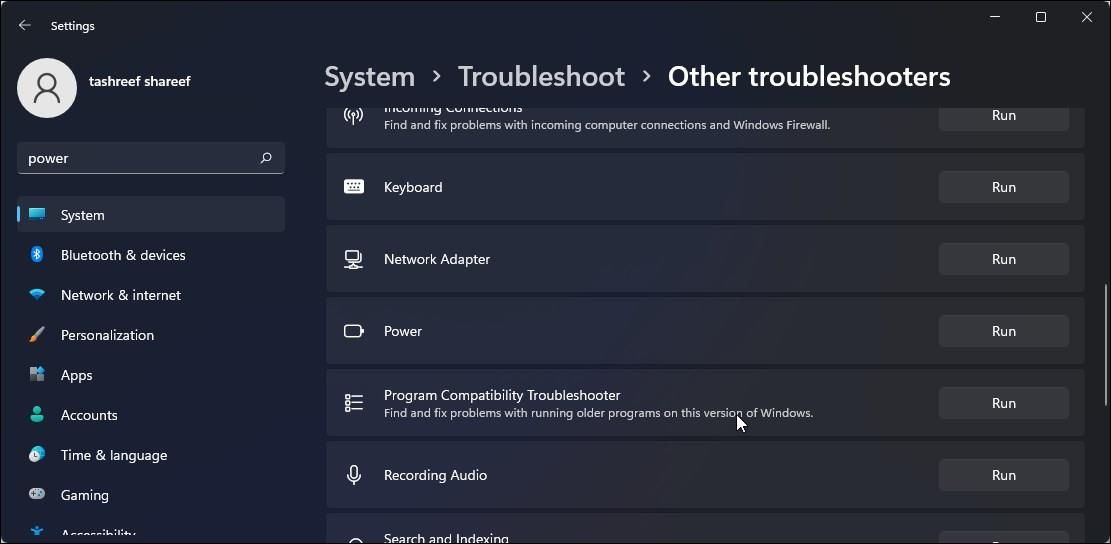
- Scroll down and click the Run button for Power. The power troubleshooter will quickly perform a scan and recommend you some fixes. Follow on-screen instructions to apply the fixes, or you can skip it and try the next one.
2. Check Your System Temperature
In poorly ventilated conditions, your system can overheat and shut down. Windows can detect thermal issues and power off the computer to prevent further damage to hardware components.
Other symptoms of heating issues include loud fan noise, performance throttling, and error messages related to temperature.
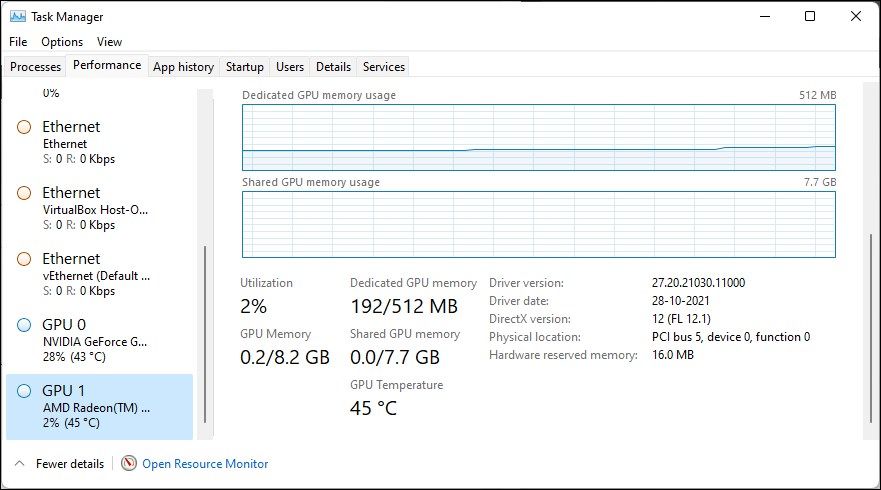
You can check your GPU temperature using the Task Manager. In Task Manager, open the Performance tab to view your GPU temperature. Unfortunately, Windows 11 doesn’t have a built-in feature to report CPU temperature.
For this, you will need to use a third-party CPU temperature monitoring app. These apps can help you keep a tab on CPU, GPU, and storage drive temperature in real-time.
If you determine an overheating issue with your system, follow these steps to fix an overheating computer.
3. Disable Fast Startup
When enabled, Fast Startup helps your PC start up faster after a shutdown. While a convenient feature, it can sometimes cause random shutdowns and crashes.
You can turn off Fast Startup in Windows 11 to see if that helps you fix random shutdown issues with your system. Here’s how to do it.
- Press Win + R to open Run.
- Type control and click OK to open the Control Panel.
- Go to System and Security.
- Next, click on Power Options.
- In the left pane, click on Choose what closing the lid do.
- In the left pane, click on Change settings that are currently unavailable.
- Unselect the Turn on fast startup option.
- Click Save Changes to disable fast startup.
4. Change Advanced Power Settings
The advanced power settings panel lets you customize power options for different system components such as hard disk, USB settings, wireless adapter, etc.
Follow these steps to tweak the advanced power settings to fix the random shutdown problem.
- Press Win + R to open Run.
- Type control and click OK to open Control Panel.
- Next, go to System and Security and click on Power Options.
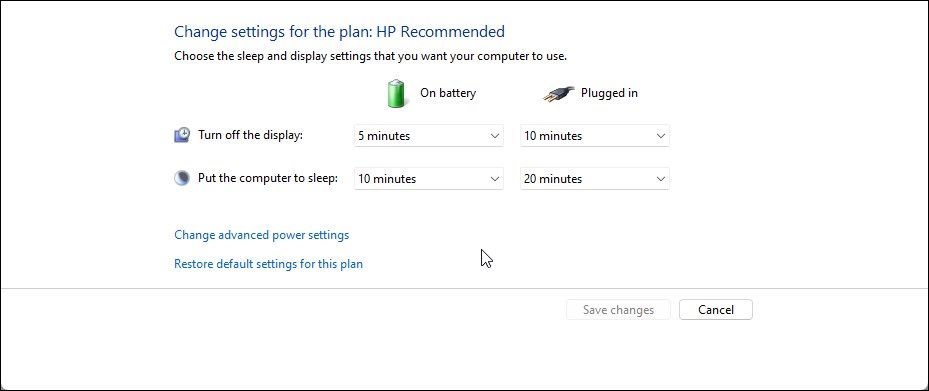
- Click on Change plan settings.
- Next, click on Change advanced power settings.
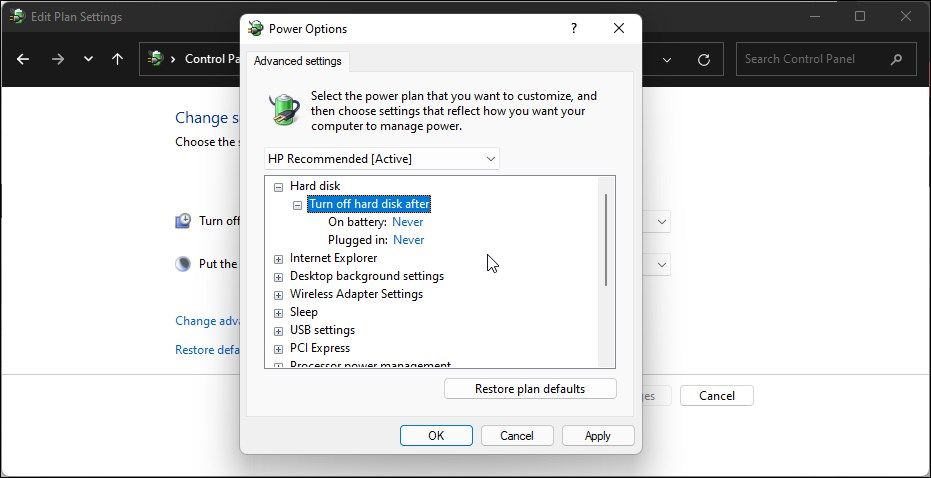
- In the Power Options dialog, expand the Hard disk section.
- Next, click on Turn off hard disk after. Here, set the On battery and Plugged in option to Never.
- Click Apply and OK to save changes.
All the Windows editions come equipped with the DISM (Deployment Image Services and Management) and SFC (System File Checker) utilities.
These are command-line repair tools to help you fix issues with your system files. While you can use the DISM tool with the local recovery image to fix system issues, the System File Checker can replace corrupted system files from the recovery image.
Follow the steps below and run these repair tools to fix the random shutdown problem occurring due to system file corruption.
- Press Win + X to open the WinX menu.
- Click on Windows Terminal (Admin) to open the app as administrator.
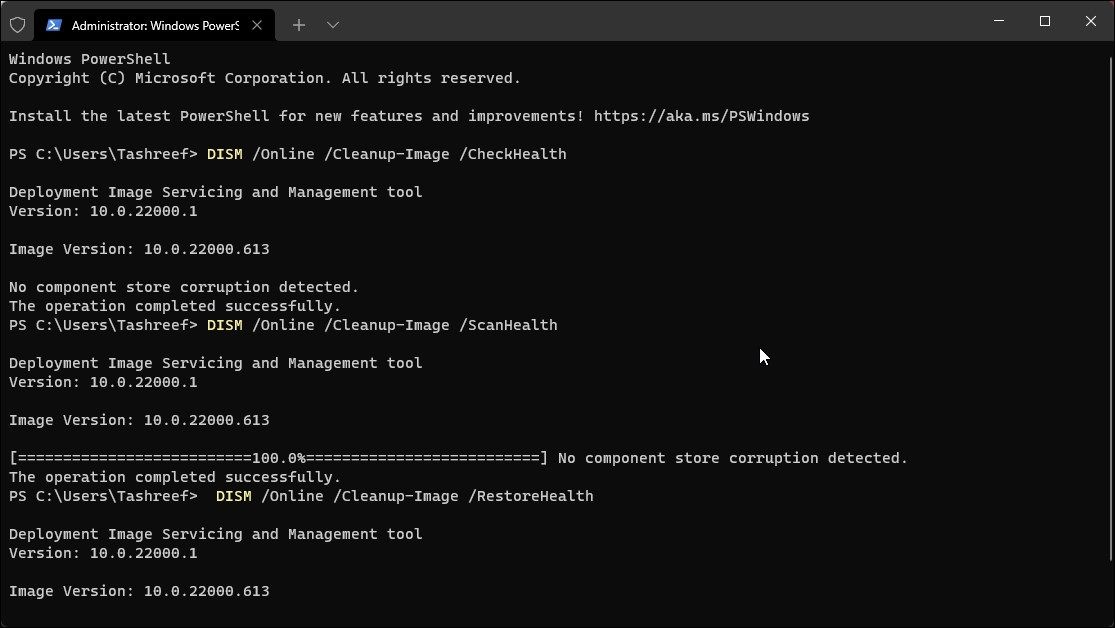
- In the terminal window, type the following DISM command one by one. These commands will look for component store corruption and perform a repair if required.
DISM /Online /Cleanup-Image /CheckHealth
DISM /Online /Cleanup-Image /ScanHealth
DISM /Online /Cleanup-Image /RestoreHealth - Next, enter the following command to run the System File Checker tool:
sfc /scannow - This process may take a while, so wait till the process is complete. Once completed, it will show the problems found and action taken to fix the issue.
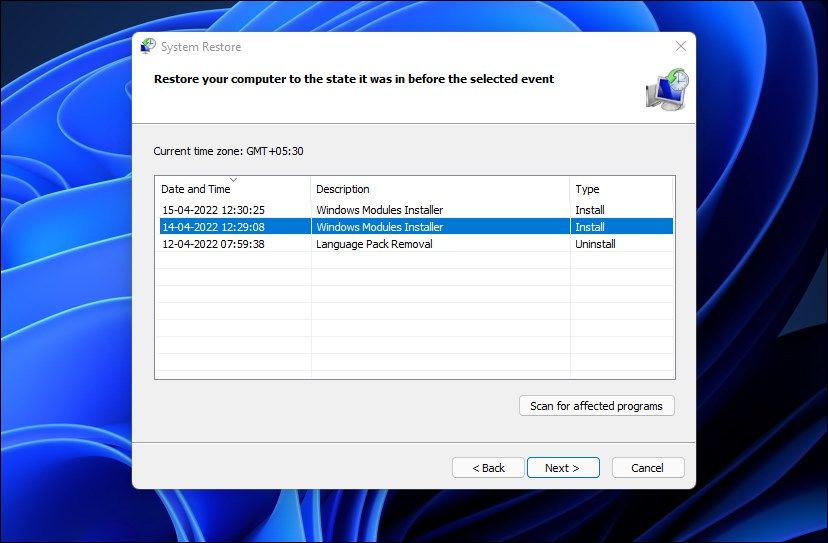
6. Perform a System Restore
Windows 11 automatically creates new restore points before major system events such as installing a new update or software. You can use the restore point to restore your PC to an earlier point where it worked without any issues.
Before you proceed with the steps below, make sure you have enabled restore point in Windows 11.
To perform system restore:
- Press the Win + R to open Run.
- Type rstrui.exe and click OK to open System Restore.
- If available, select the Recommended restore option.
- Check the Show more restore points box if available. This will list all the restore points saved on your PC.
- Select the most recently created restore point and click Scan for affected programs. This will help you find out which programs will be affected if you proceed with the selected restore point.
- Next, click Close and click Next.
- Read the description and click on Finish to initiate the restore process. This may take some time, but your PC will restart after the process is complete.
7. Test RAM and Hard Drive
Hardware malfunction is another common cause of abrupt system shutdowns and can be an indication of failing hardware. To determine the cause, you can stress test the RAM overnight using the built-in Windows Memory Diagnostic tool.
Similarly, the issues could also be with your storage device. So it is recommended to test your hard drive or SSD before it goes kaput. Follow our guide on how to test your PC for failing hardware to perform diagnostic tests and spot the fault.
8. View Shutdown Log in Event Viewer
If the issue persists, you can use the Event Viewer to view the shutdown log and understand what’s triggering the restart or shutdown.
To find the shutdown log using Event viewer:
- Press the Win key and type event viewer. Click on Event Viewer from the search result to open the app.
- In Event Viewer, click on Windows Logs.
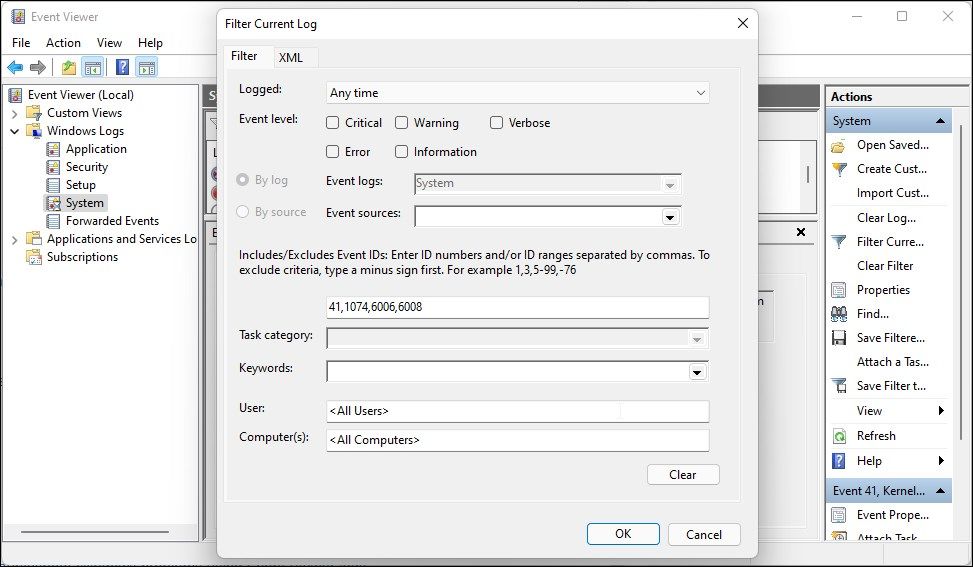
- Next, right-click on System and select Filter Current Log.
- In the All Event IDs field, type 41,1074,6006,6008 and click OK.
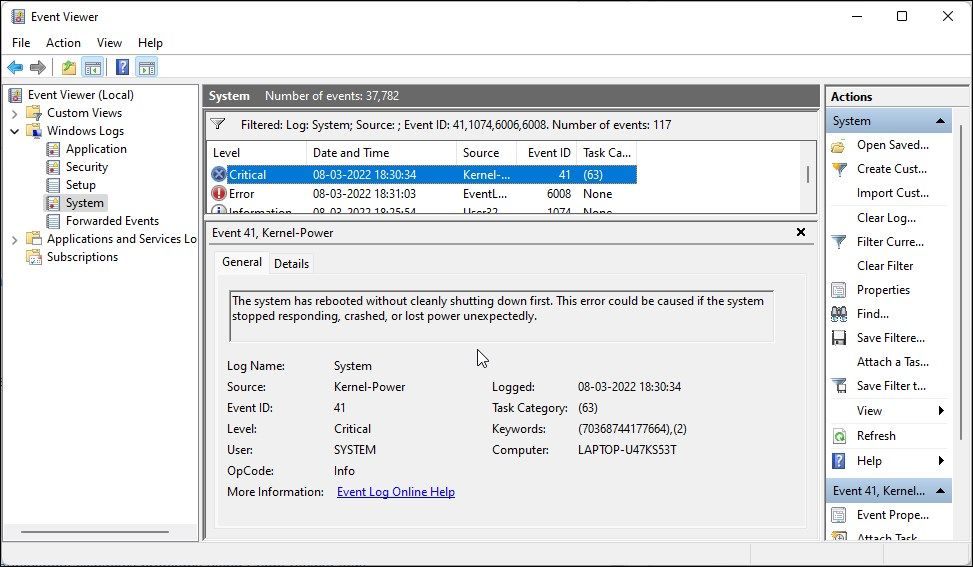
- The Event Viewer will display all the shutdown-related events. Scroll down and click on Critical or Error log to view the general information on the system shutdown event.
Analyzing the Event Viewer data can be tricky. To understand it better, follow our detailed guide on how to troubleshoot Windows problems using Event Viewer logs.
Stop Unexpected Windows 11 Shutdowns
An abrupt shutdown can be annoying and negatively affect your productivity. To fix the problem, you can review the shutdown log to find any issues that may need your attention. Also, check your system for hardware failure, overheating problems, and software conflict.
Read Next
About The Author

