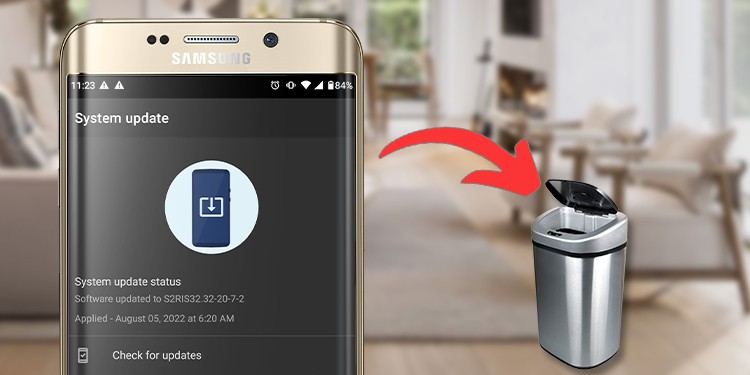
How To Uninstall Android Update?
Installing the latest updates on your phone helps to get new features, remove bugs, and get security patches protecting your data and information. But, sometimes it is possible that your device starts performing poorly right after you install the available updates.
The problem can be a result of a compatibility issue with your device or the manufacturer’s hardware. In such a scenario, you may wonder whether you can get back to the state before installing that particular update.
A few tried and tested methods can help uninstall the Android update. Let’s discuss them in detail.
How to Uninstall Android Update
The process of uninstalling Android updates can sound huge and may trouble people. There is a possibility that you may hard or soft brick your device. It means the device will no longer be operable. The methods are few and can be tiring for some, but those with a bit of knowledge about bootloader and fastboot may find it easy to deal with.
We have tried out best to simplify the steps to ease the pressure off your shoulder and help you get the mission accomplished.
Wipe Data through Recovery Mode
The first one is to wipe everything using the Recovery Mode on your phone or tablet. When you use this method, you need to be aware that everything on your device will be erased. So, you need to create a backup of your files. After that, you can move on to wipe data via recovery mode.
Samsung
- Scroll down from the top using two fingers and tap the Power icon.
- Then, press the Power off option. Tap the screen for the second time to switch off the device.
- Now, press and hold the Power and Volume up buttons. Do this until the Samsung emblem displays on your device screen.
- Pick the Wipe data/ factory reset option from the Android Recovery section. Use your volume button to move and the power button to select the choice.
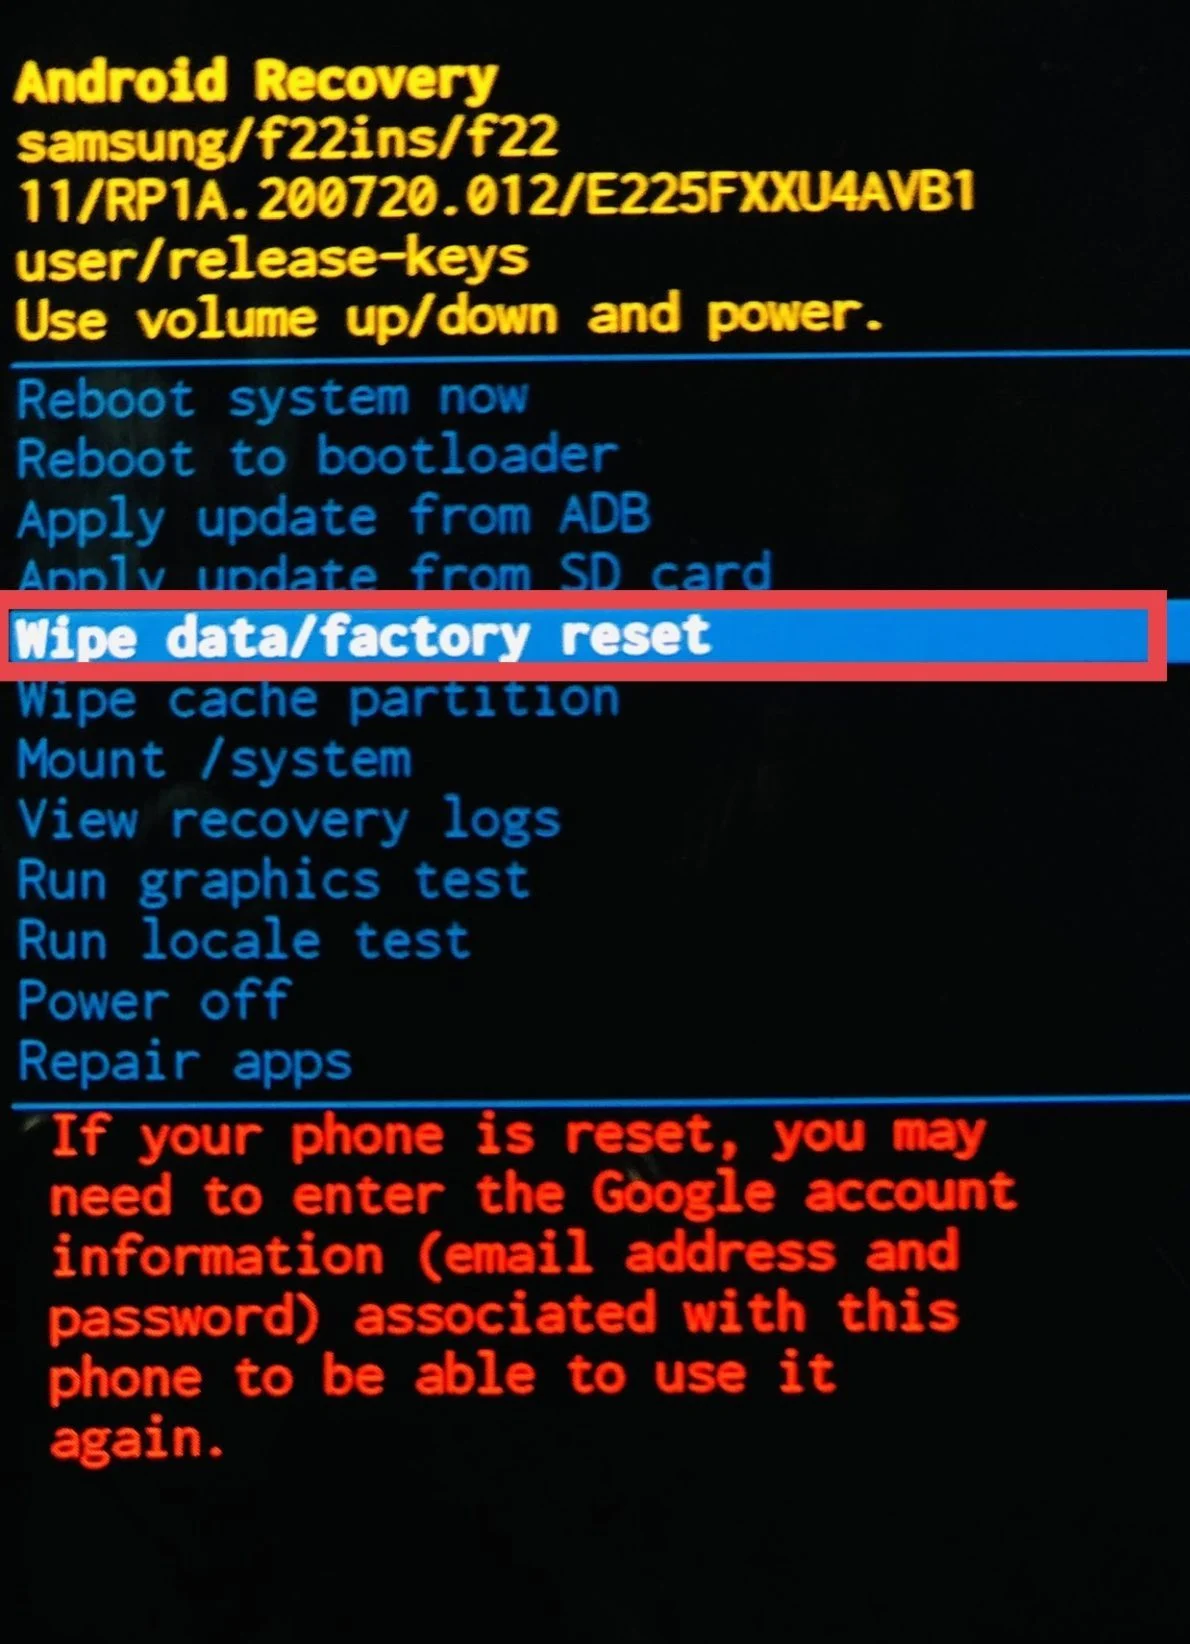
- Next, select Factory Data Reset.
- After the process is complete, you will once again see the recovery menu. This time, you need to choose the Reboot System option.
Xiaomi
- First, switch off your device by pressing the Power button and tapping Power Off.
- Then, keep pressing the Power and Volume up buttons until you see the Mi trademark emerge on display.
- On the Main Menu, use the Volume button and highlight the Wipe Data option.
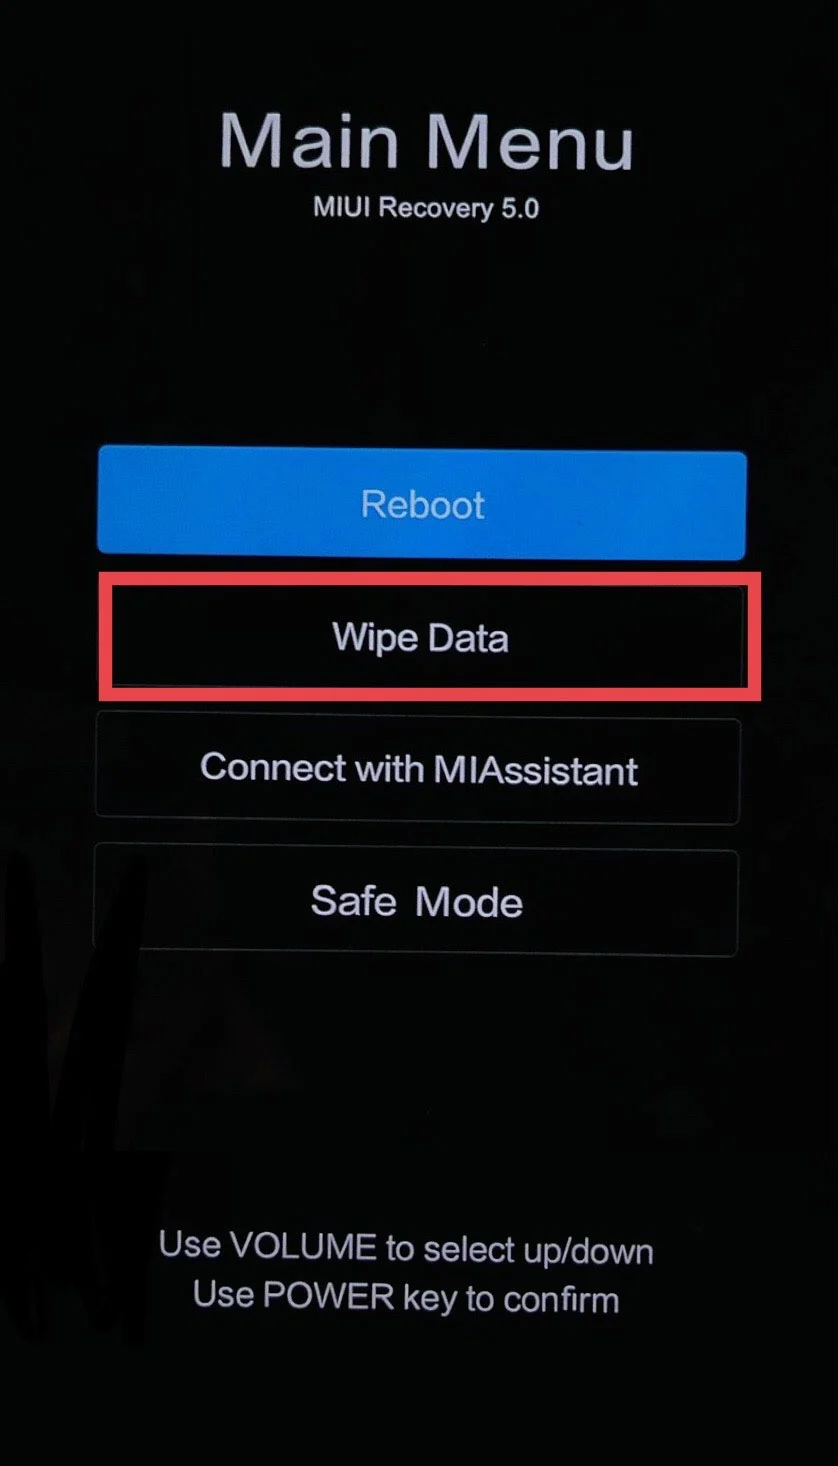
- Now, press the Power button to confirm your choice.
- Next, highlight Wipe All Data using the Volume button and press the Power button.
- After that, proceed with the Confirm Wipe of All Data option by pressing the Power button.
The method of entering recovery mode and the concurrent steps can vary as per the Android model.
Revert Back to Previous Android Version
Another method you can try is to revert your device to the previous Android version. To do this, you will need to access Developer options on your device. Also, you need to download and install SDK (Software Development Kit) Platform tools and Factory Image files on your computer.
Some companies like Samsung and Redmi provide their proprietary software to flash the system image to the device. They recommend using this method as a safety measure for your device. If you are comfortable using the SDK platform, please continue with the process. Otherwise, you can take expert help.
A step-by-step guide to revert back the device to the previous Android version is listed below.
- First, head to the Setting menu of your tablet or phone.
- Scroll down and select About phone or About device, depending on the device.
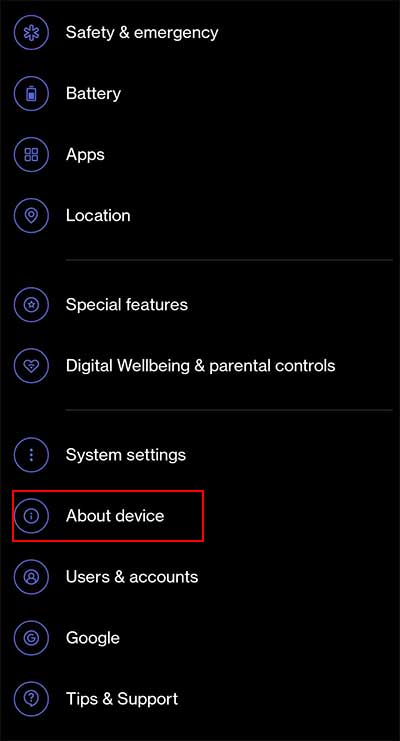
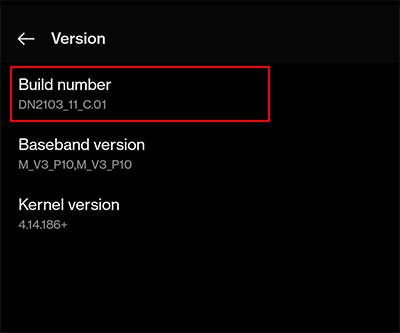
- Then, tap the Build number continuously until the message indicates You are now a developer! appears on the screen. (Depending on your device, you may need to select the Version option if you don’t see the Build number.)
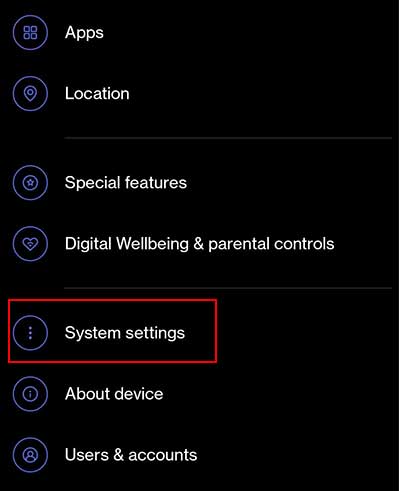
- Now, head back to the settings menu and choose System or System Settings.
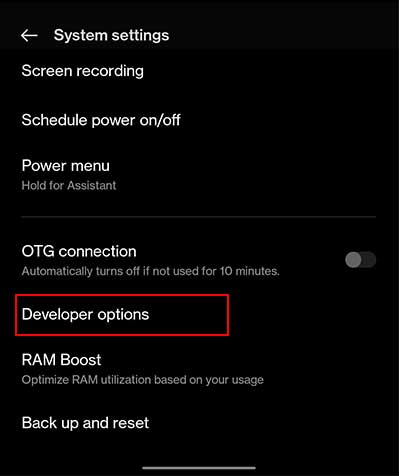
- Locate and select Developer options.
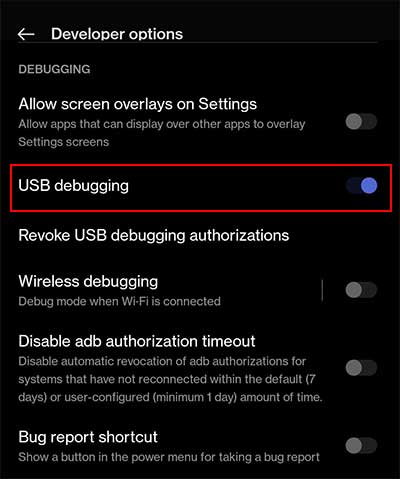
- You need to navigate to the USB debugging option and turn it on.
- Also, toggle on the OEM unlocking option.
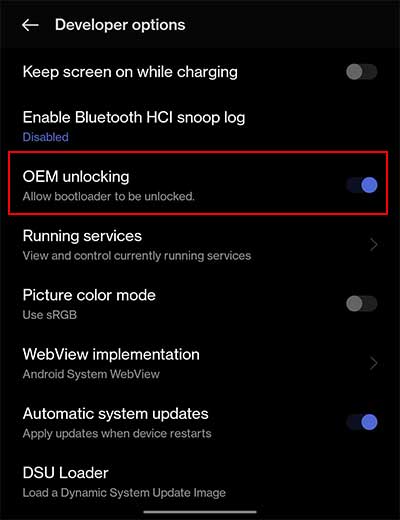
- After that, connect the device to the computer using a USB wire.
- Open a web browser on the PC, head to the SDK Platform Tools website, and download and install it.
- Next, download the factory images for your device and unzip their components on the SDK folder. To download the factory image file, type ‘Factory image for XX’ on the web browser on your computer. (Type your device name in place of XX.)
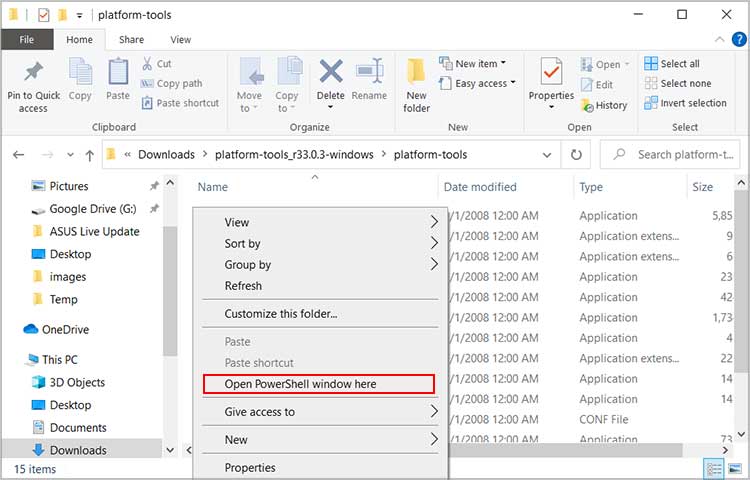
- With the SDK folder open, press Shift and right-click an empty space.
- Go with the Open PowerShell window here option.
- Input
adb devicesand press Enter to see whether your device shows up or not. You will see the device’s serial number. But, if you don’t, try plugging the USB wire into a different port or use another USB wire. Also, you need to tap Allow on your phone to establish its communication with the computer.
- Then run
adb reboot bootloaderto run your device in fastboot mode.
- Now, execute
fastboot oem unlockorfastboot flashing unlock, whichever works. (Remember that some devices like Redmi require you to register the device on their server website and get the access code to unlock the bootloader.)
- After that, double-click the Windows Batch file named flash-all.bat. If you don’t see this Windows Batch file, run the following commands one after the other:
fastboot flash bootloader [bootloader file name].imgfastboot flash radio [radio file name].imgfastboot reboot-bootloaderfastboot flash -w update [image file name].zipfastboot reboot
- Finally, the device will restart and should have an older Android version. Then, set up your phone.
