How to Perform Effortless Windows Backups With Veeam Agent
Are you tired of the Windows backup tool and the current third-party tools out there? Allow us to present another commercial piece of software: Veeam Agent. How’s that interesting? Because, much like some of its competitors, it enables you to “clone” your OS to a backup, even while using it. Unlike the competitors, though, Veeam Agent is free.
So, let’s see how you can set up Veeam Agent to backup Windows in the background, providing the equivalent of an undo function for your OS.
How to Download and Install Veeam Agent
You can use the tools that come with the OS to create a complete backup in Windows 11. However, Veeam Agent is friendlier, easier on your PC’s resources, and effortless to use.
You can download Veeam Agent from its official site for free. Note, though, that the site will ask you to register before doing so.
For fans of Chocolatey, the installation is easier since it skips that boring part. You only have to use the following command in a terminal to bring Veeam Agent on board:
choco install veeam-agent
We should note that, like most similar solutions, Veeam Agent expects you to have a secondary storage device where to store your backups. You wouldn’t be able to restore a backup for a malfunctioning storage device if it was stored on the same failing device.
So, connect something like an external HDD or a large USB flash drive to your PC. Then, read on to see how you can set up Veeam Agent to keep backups of your OS automatically.
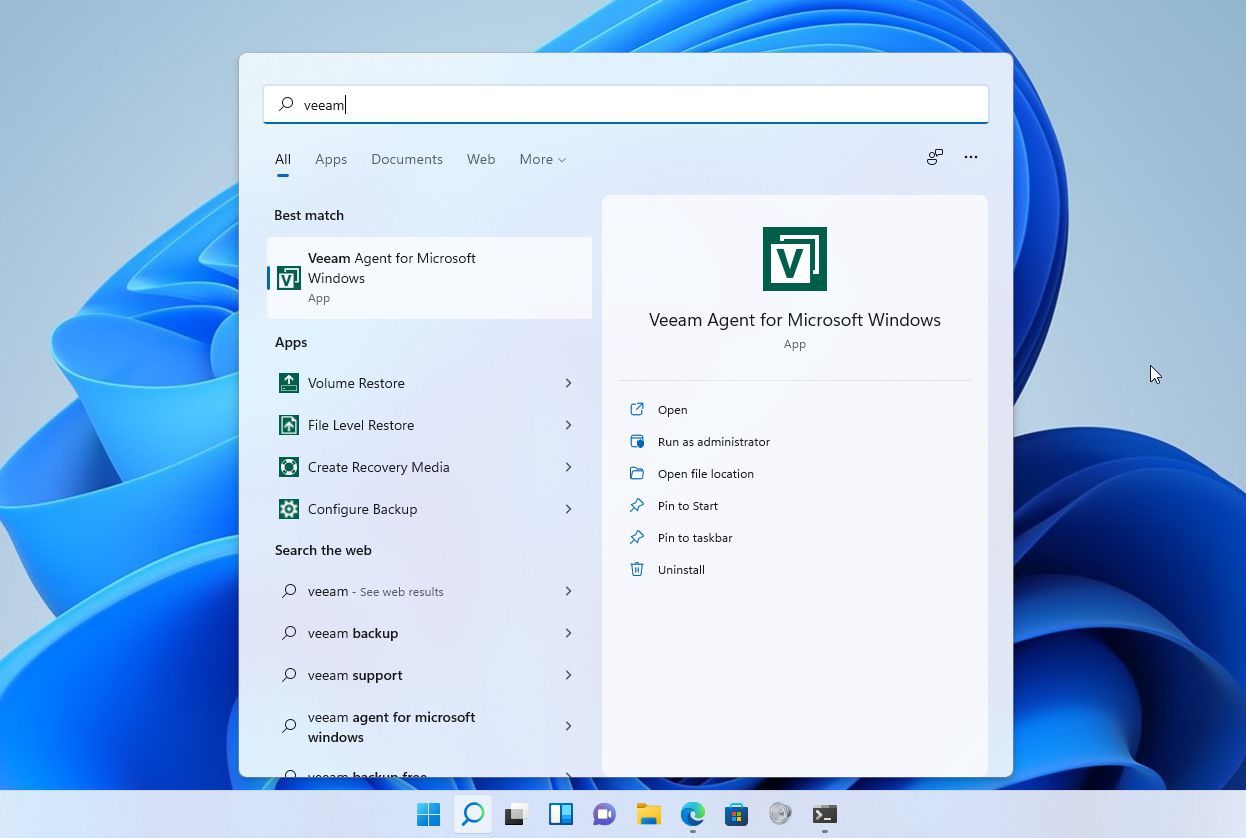
Locate Veeam Agent among the rest of your installed apps, and run it. After setting it up, as we’ll see next, it will remain active, and you won’t need to deal with any settings or tweak anything again.
Veeam Agent will notify you that Recovery media has not been created. Since it would be useless to take backups that you won’t be able to restore, it’s best if you create Recovery media from the very beginning. So, click on that notification to do so.
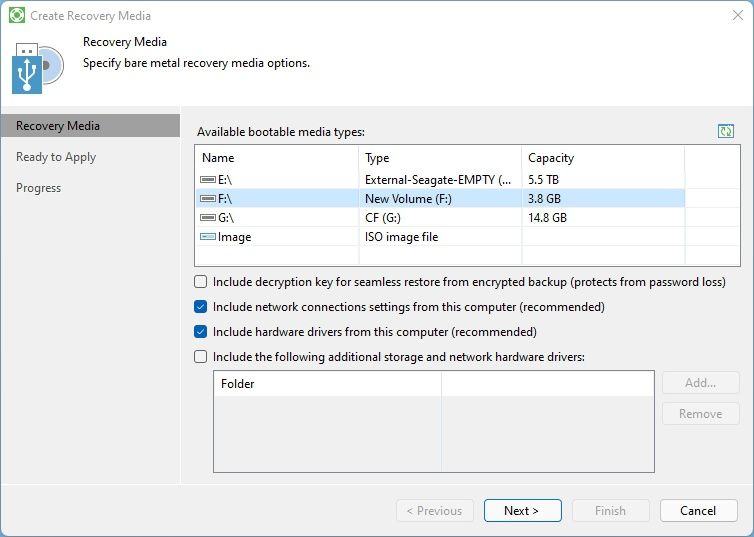
From the window that appears, choose your external storage device where you want to store Veeam Agent’s backups. Check the rest of the available options if you’d prefer to use a network share instead. For seamless restoration of encrypted backups, you can also enable the option to Include decryption key in them.
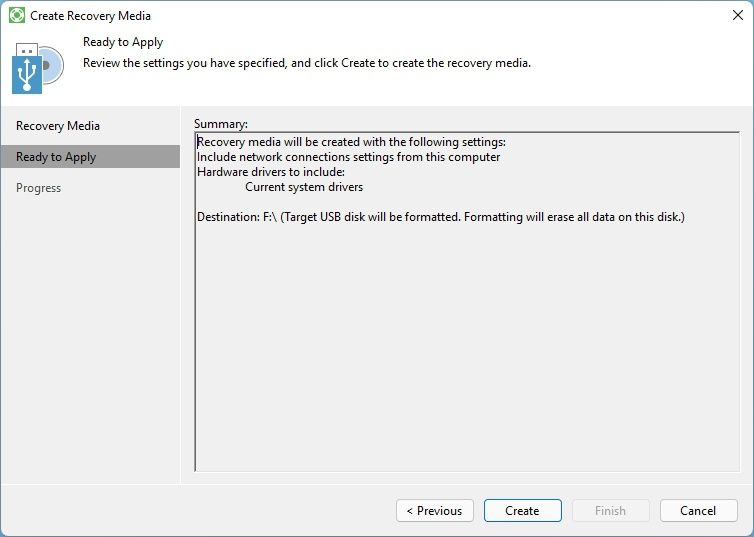
If the storage device you selected already contains data, Veeam Agent will prompt you to format it for use as Recovery Media. After answering positively at that prompt, Veeam Agent will display a summary of the procedure. Click on Create to proceed.
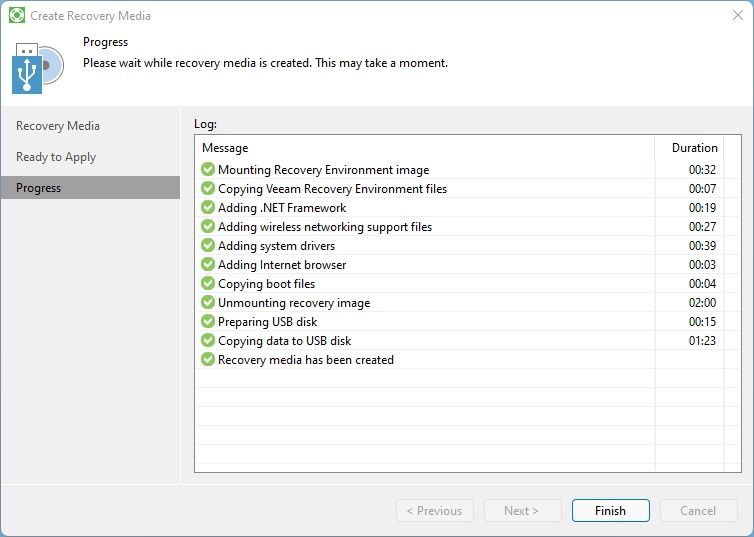
The process takes one or two minutes to complete, depending on the size and speed of the selected media.
Using the Storage and Settings
You’ll find most of the settings that need tweaking while creating a backup process. However, Veeam Agent offers some extra options that affect how it works.
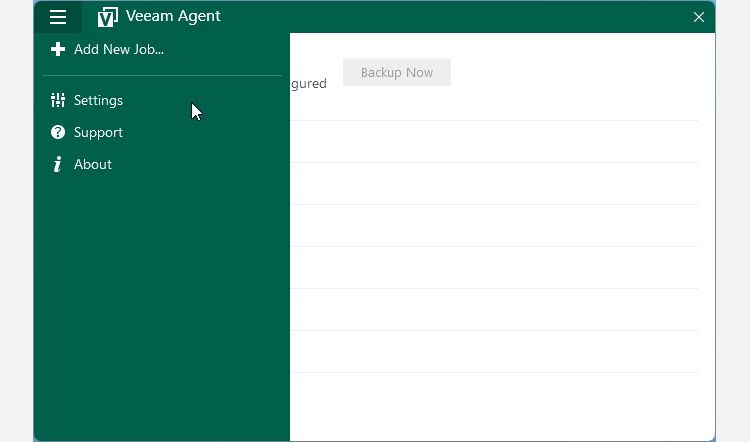
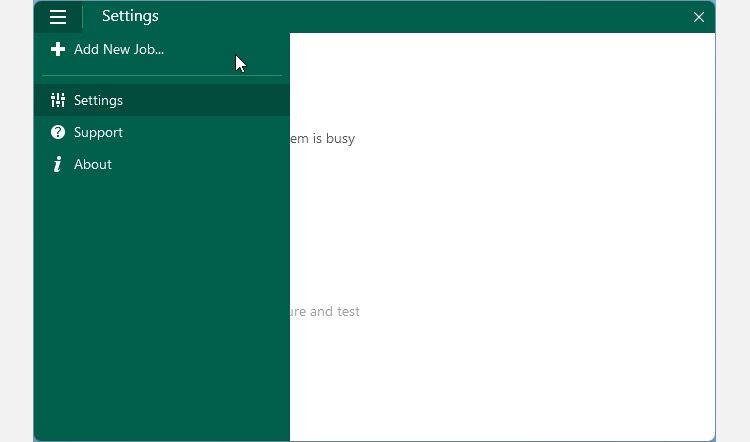
Click on the “hamburger menu” (with the three horizontal lines) at the top left corner of Veeam Agent’s window. Then, choose Settings from the menu that shows up.
If you ever decide to pause Veeam Agent for a period, place a checkmark on Disable scheduled backups. Veeam Agent will stop taking new backups until you disable that option.
Below that, ensure that Throttle backup activity is active when system is busy is active. This option lowers Veeam Agent’s process priority to avoid slowing down your PC when taking a backup.
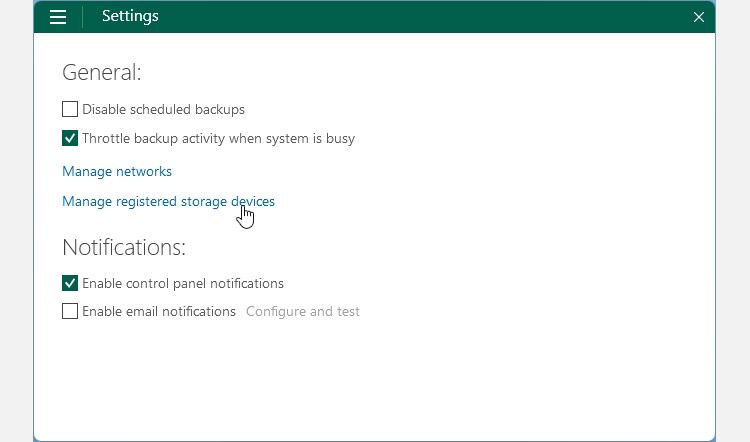
Although Veeam Agent’s notifications are few and informative, if you don’t want any, you can disable Enable control panel notifications. Feel free to leave the rest of the options as they are.
How to Set Up the System Backup Process
The free edition of Veeam Agent differs in some ways compared to its non-free brethren. The most significant limitation is that it only allows setting up a single OS backup job. Still, that’s more than enough for securing your Windows installation. To set it up, click on Veeam Agent’s menu button and choose Add New Job.
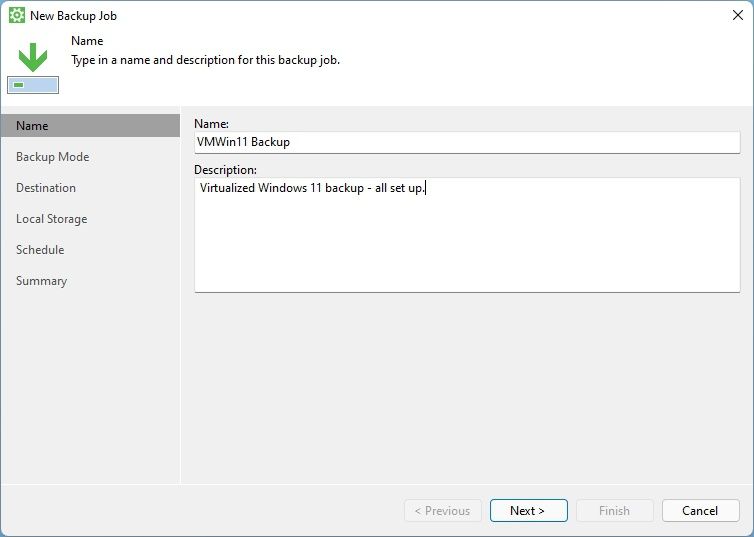
Start by entering a name and description for your backup.
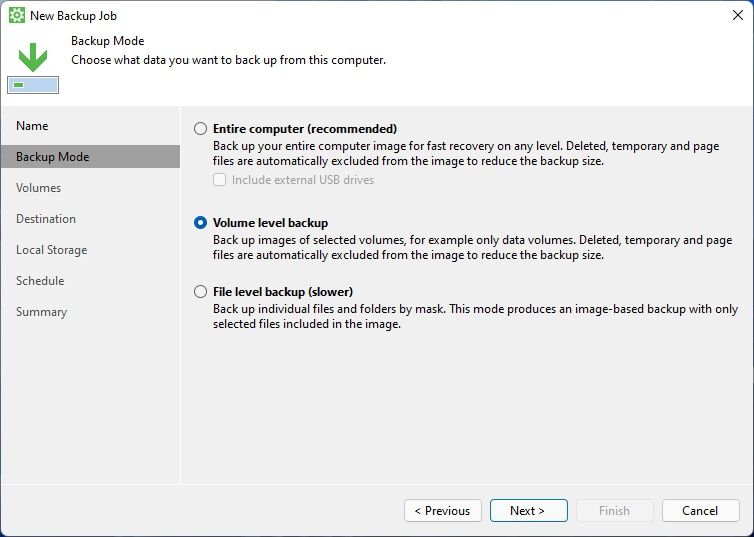
Veeam Agent’s default backup mode is Entire computer. However, that means that the backup will include everything, including non-essential data. Plus, you’ll need to dedicate to it almost as much storage.
For most users, it’s better to use Veeam Agent to only backup the OS and then rely on other solutions (like cloud sync services) for backing up personal files.
Thus, change the backup’s mode from Entire computer (recommended) to Volume level backup.
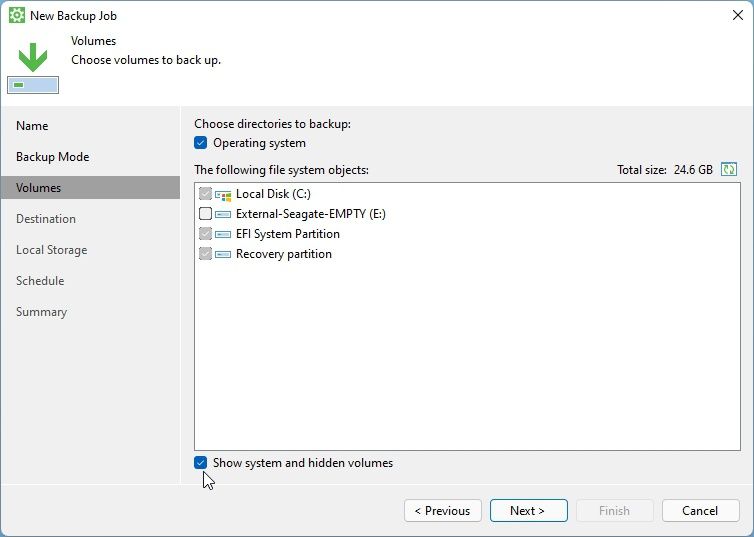
Place a checkbox before Operating system, and Veeam Agent will guess the partitions to backup for securing your Windows installation. We suggest you also enable Show system and hidden volumes and check if it missed something.
Leave the backup’s destination as Local storage to save it in a secondary storage device directly connected to your PC.
Veeam Agent also supports network backups. We’ll skip those for this article since we’re dealing with the primary OS of a single personal PC.
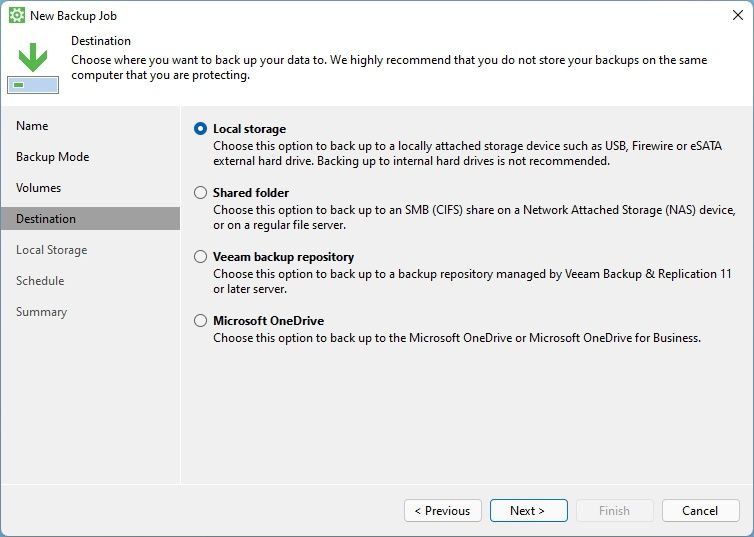
After selecting your backup destination, you can also choose how many days of backups you’d like to keep.
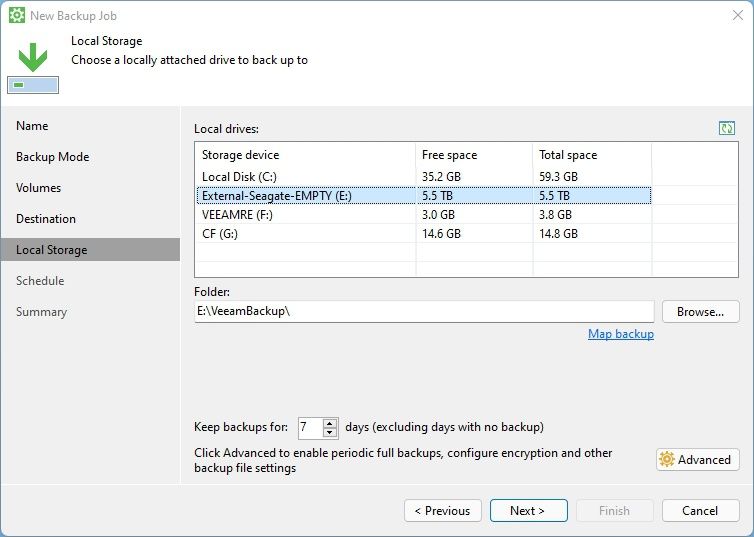
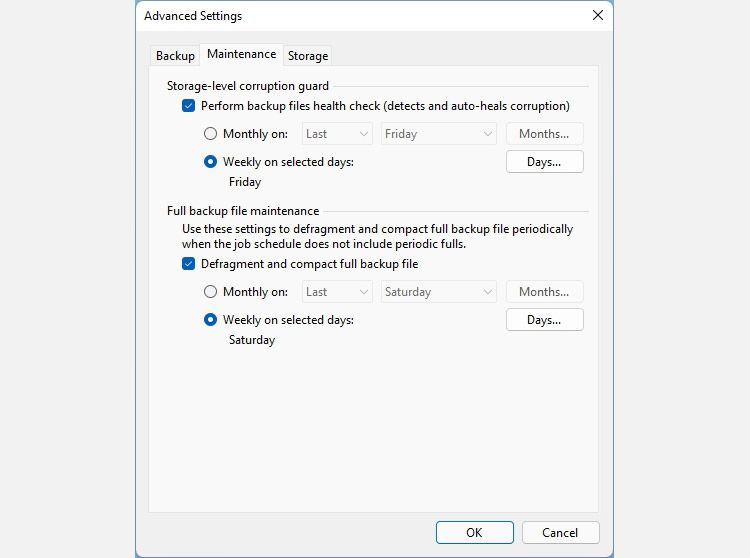
Click on the Advanced button to further customize your backup. The defaults on the Backup tab should work fine for most people. However, it’s worth enabling Perform backup files health check (detects and auto-heals corruption) and Defragment and compact full backup file on the Maintenance tab. We consider the options self-explanatory, so we won’t linger more on them.
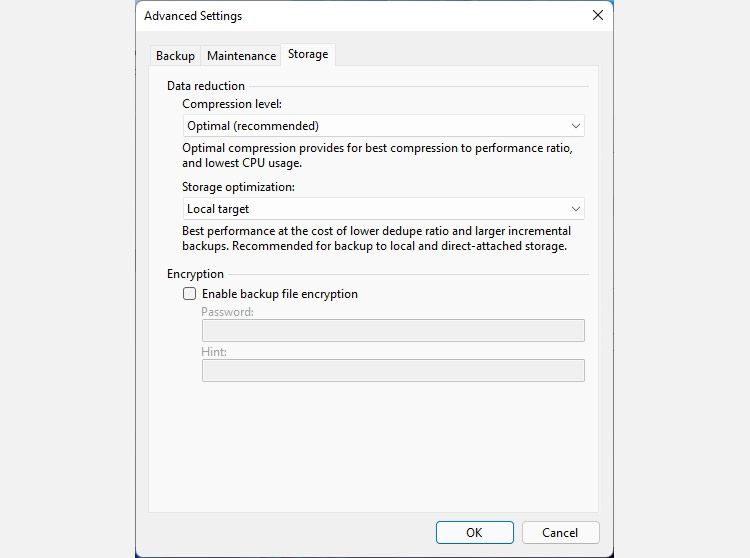
Visit Storage if you want to adjust your backup’s compression level and optimization strategy. Those options will be tuned optimally for local storage, so you don’t have to tweak them.
To save space, you can choose a more “network-friendly” compression level and storage optimization strategy. Those produce smaller files but need more resources during backup and recovery.
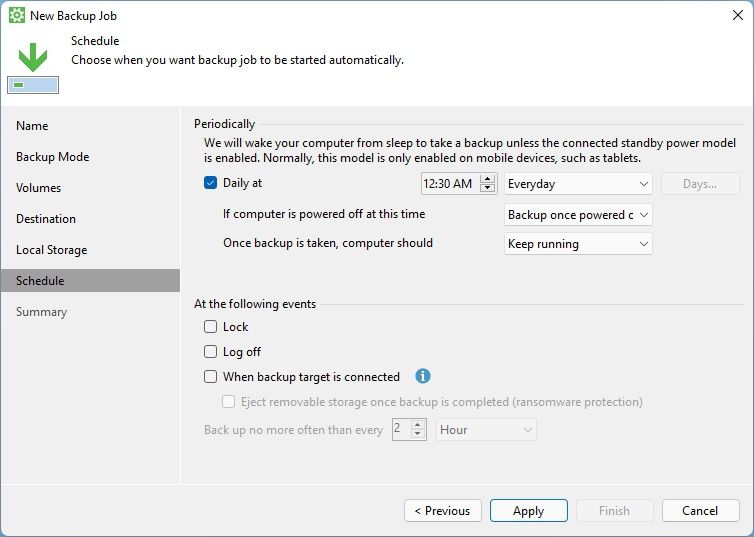
Proceed to the next step and set up a schedule for your backup. We suggest you go for daily backups. With the settings we saw, Veeam Agent will take incremental backups so that they won’t eat up too much storage space, even with a daily schedule. Leave the rest of the options as they are.
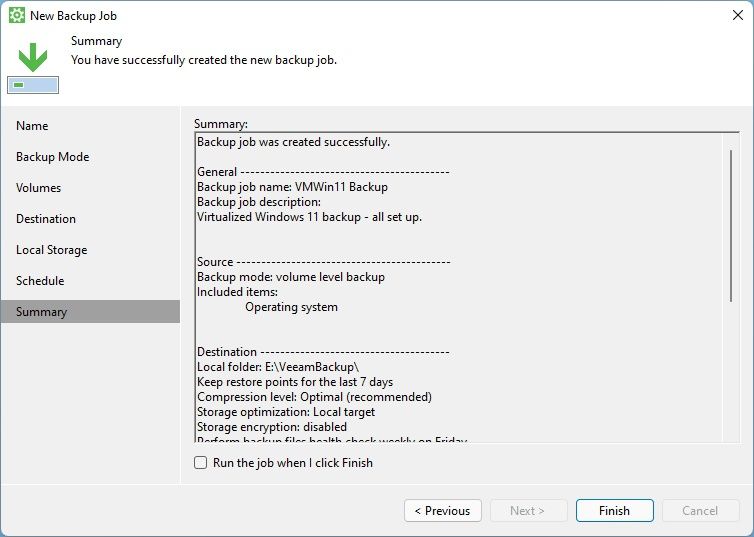
Finally, check the operation’s summary, and click on Finish to create your backup job.
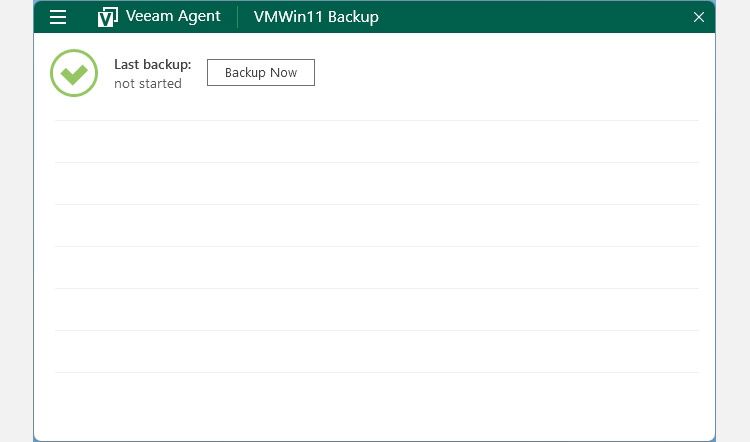
With your backup job set up, click on Backup Now to manually initiate your first backup if you don’t want to wait for it to start automatically.
Veeam Agent will show you the progress of the backup (if you keep its window visible, otherwise, it will keep running in the background).
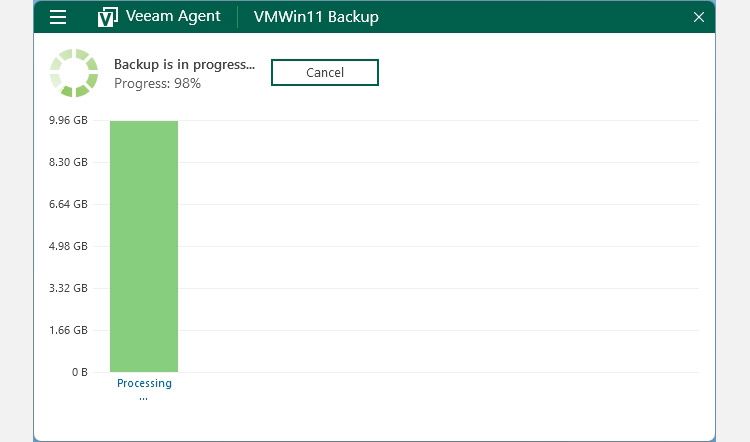
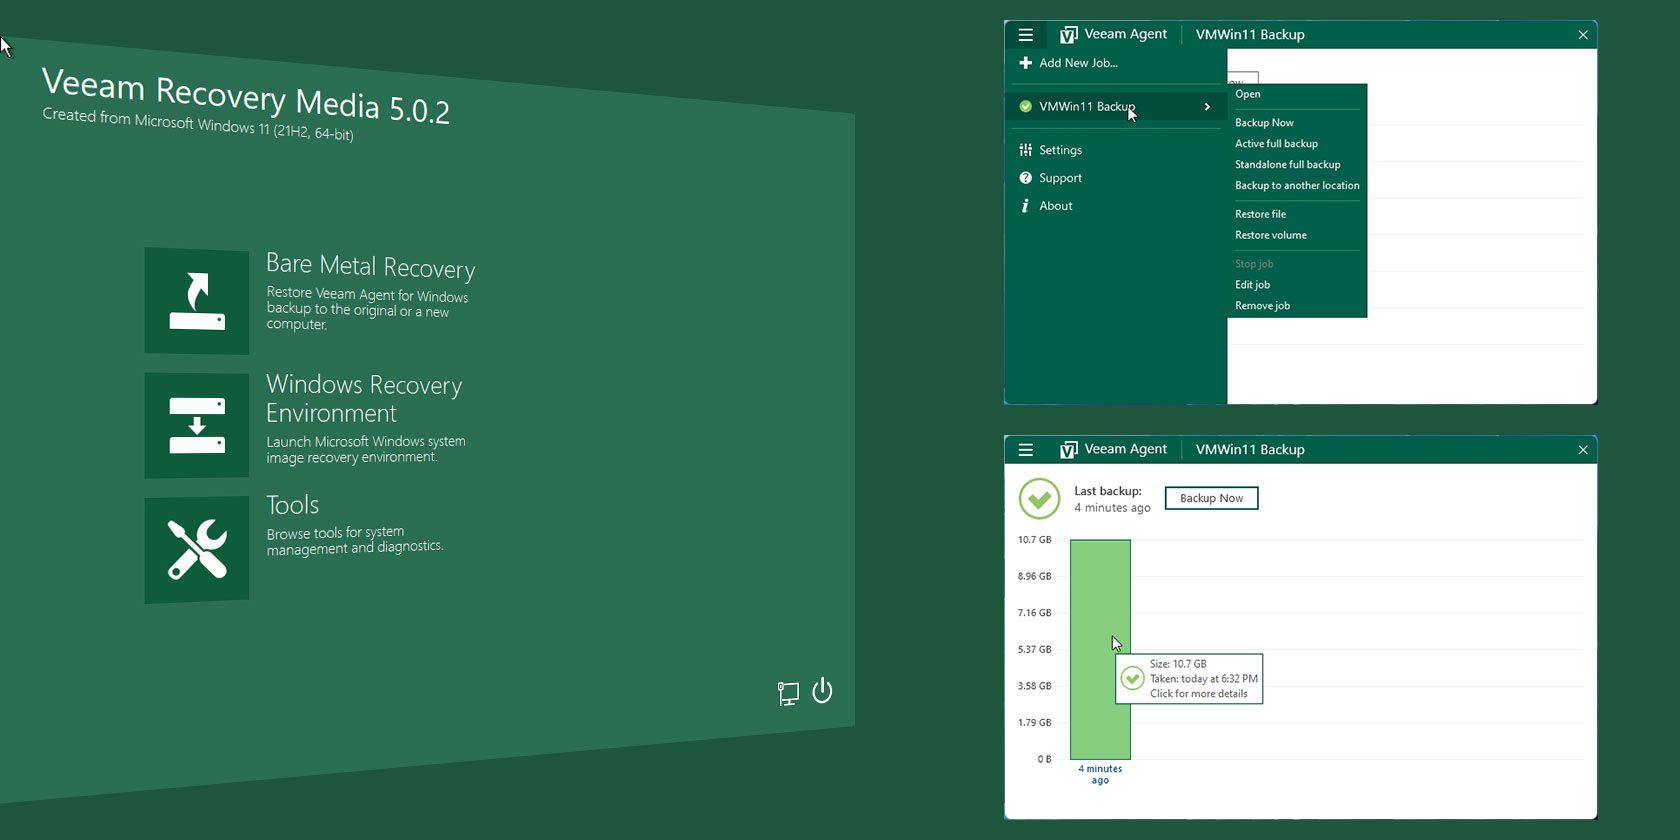
Each backup is represented by a storage graph that shows how much space it occupies. If you point your mouse cursor at a backup, you’ll see more information about it in a small hovering window.
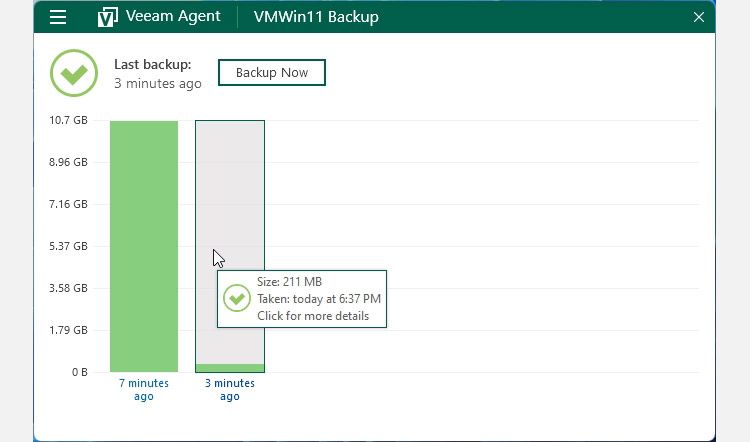
If you ever decide to change your backup’s settings, click on Veeam Agent’s menu button. Your backup job will now be listed there. Select it and choose Edit job from the sub-menu that will show up.
And with that, you’re set. There’s no point in keeping backups if you can’t recover them, though, so let’s also see how you can do that.
How to Recover a From Backup
To recover a backup with Veeam Agent, you’ll have to use the recovery media you created. So, connect it to your PC and boot from it.
Check your computer’s or motherboard’s manual to find how you can select a different boot device (in this case, the recovery media).
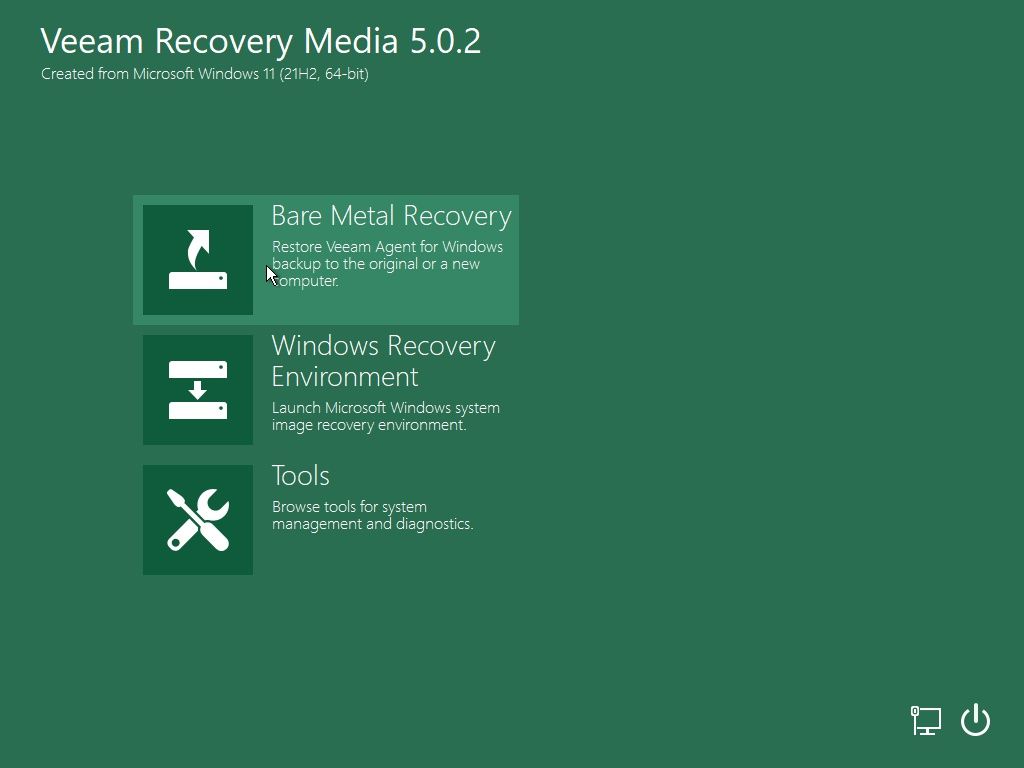
Veeam Agent’s recovery media takes a while to load. When its interface appears, choose Bare Metal Recovery.
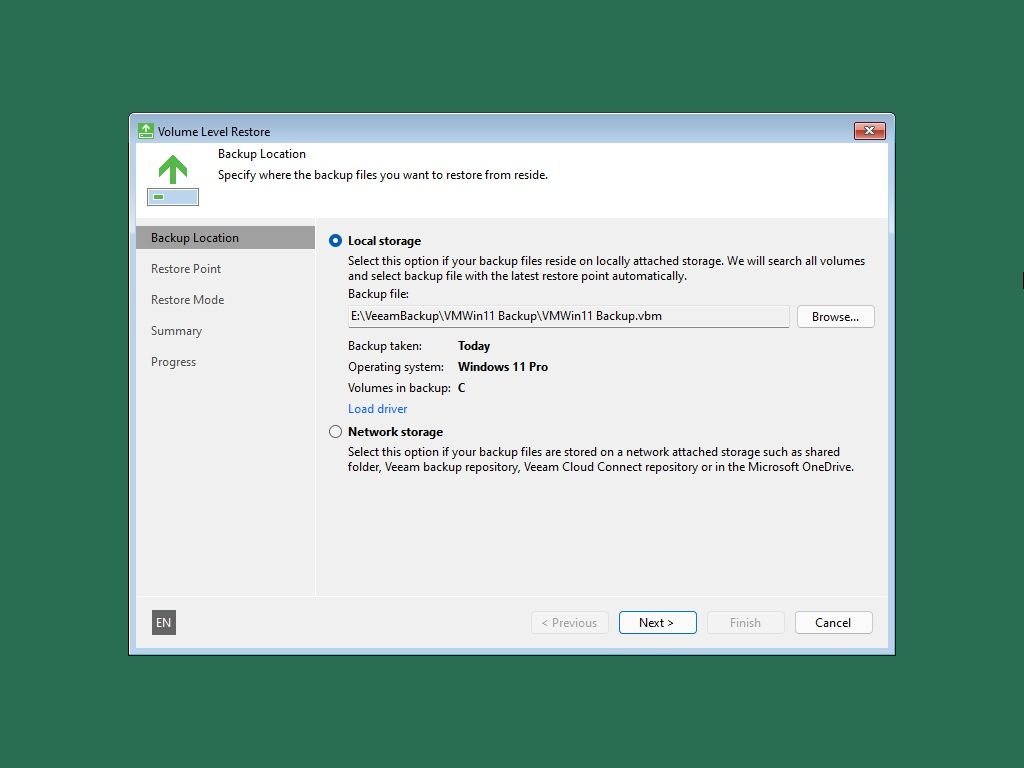
Leave the Backup Location set to Local storage if your backup is stored on a local drive. If Veeam Agent can’t find it automatically, click on Browse to locate and select it manually.
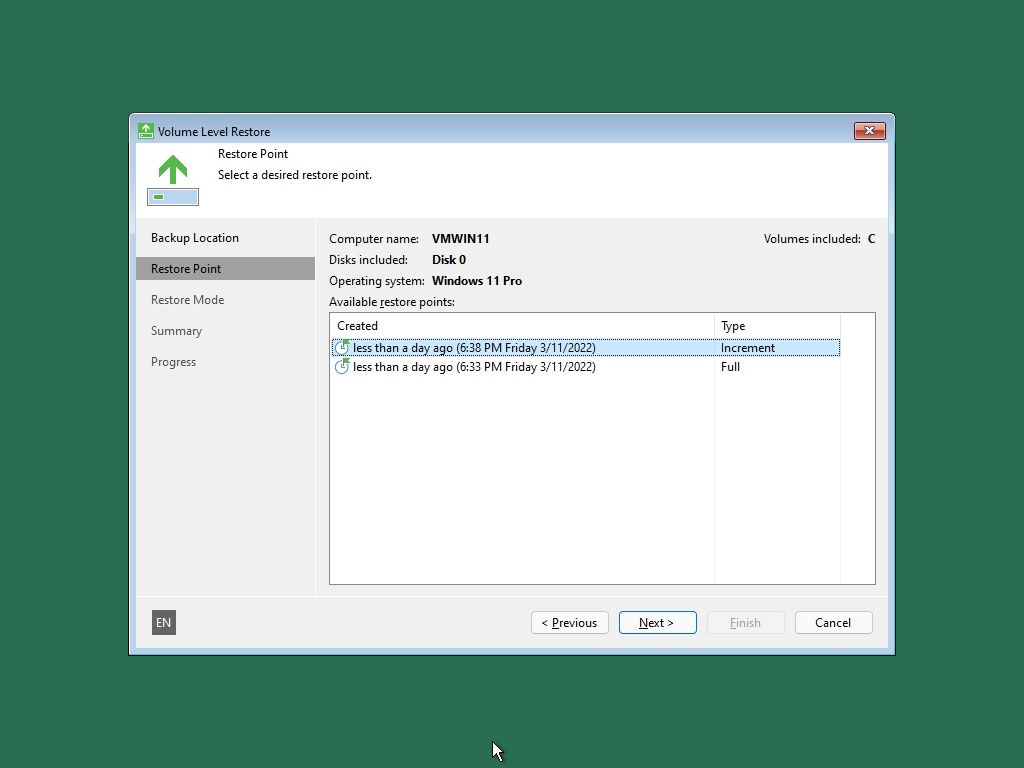
Select the Restore Point to which you want to revert your PC.
Change the Restore Mode from Entire computer to System volumes only. If you want to ensure that Veeam will restore your backup on the correct partitions, go for Manual restore (advanced) instead.
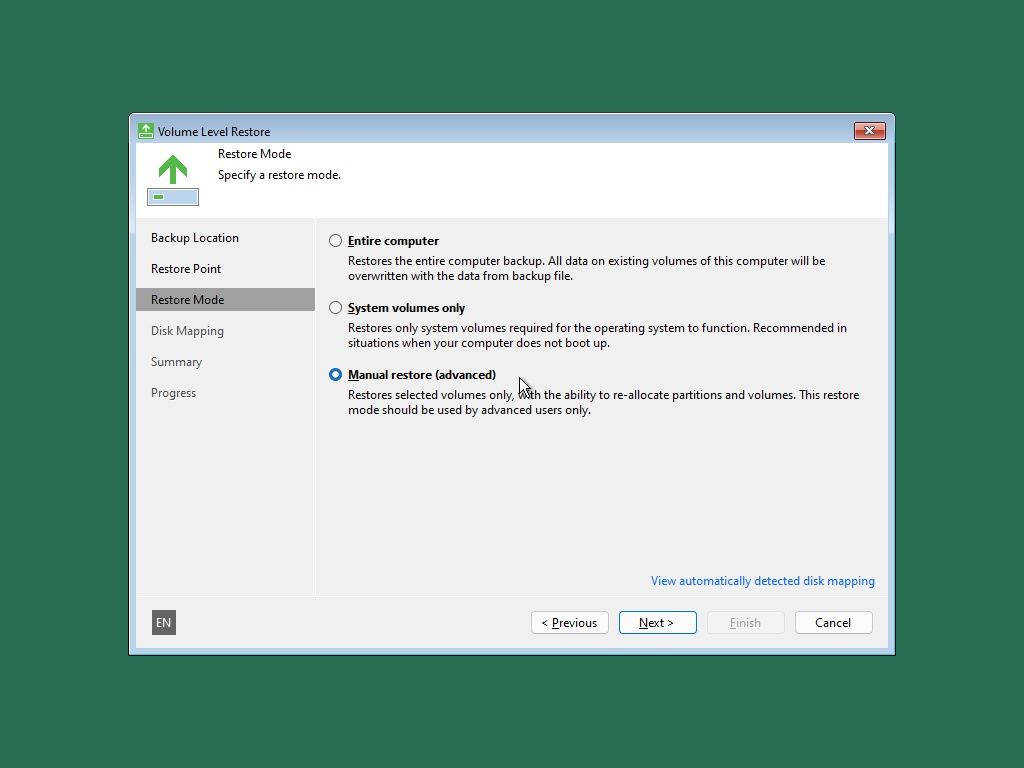
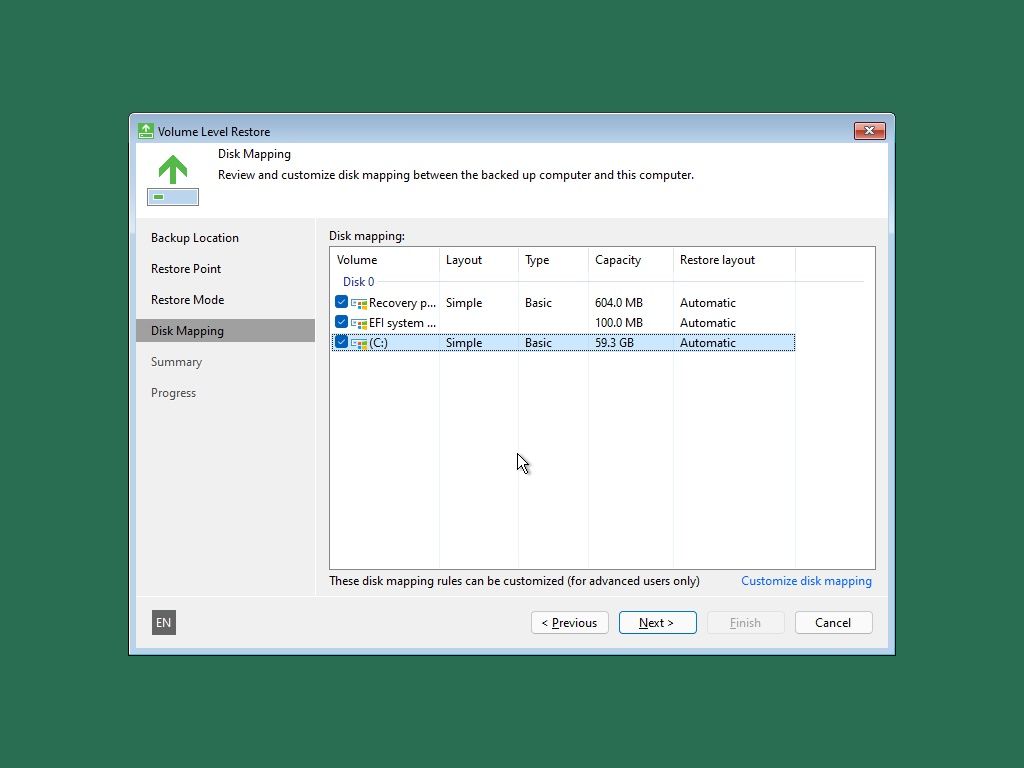
If you choose the manual restore route, you’ll have to check Disk Mapping, also known as “what Veeam Agent will restore where”. Ensure it won’t try to, for example, restore your EFI system partition over the one with your work-related data.
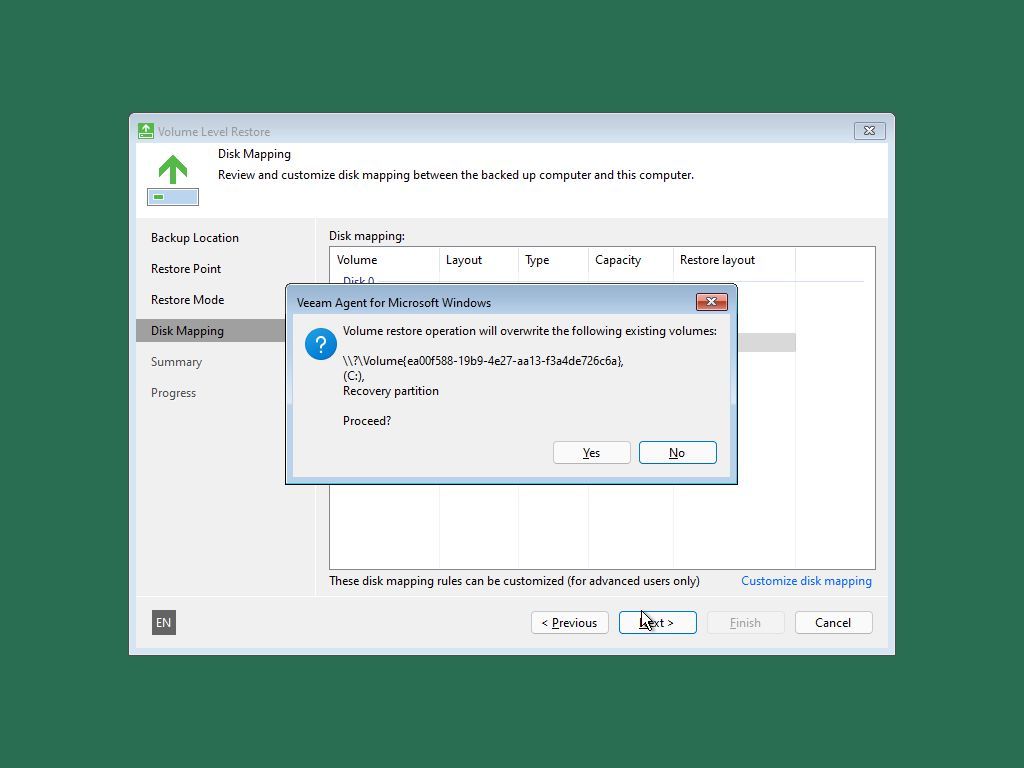
Veeam Agent will show you a warning about how the affected partition’s contents will be deleted, replaced by the restored backup. Click on Yes if you’re sure you want to proceed.
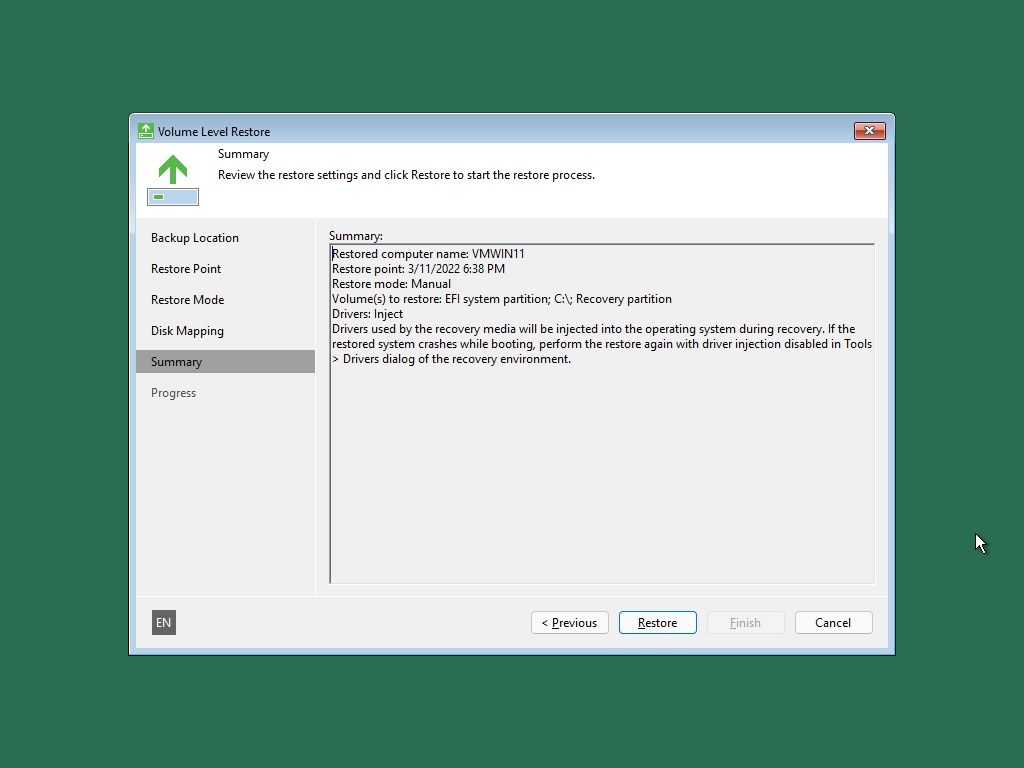
Finally, check the process summary, and click on Restore to revert your Windows installation to the selected backed-up state.
The recovery process is quite fast, and it won’t take long to have your OS back up and running.
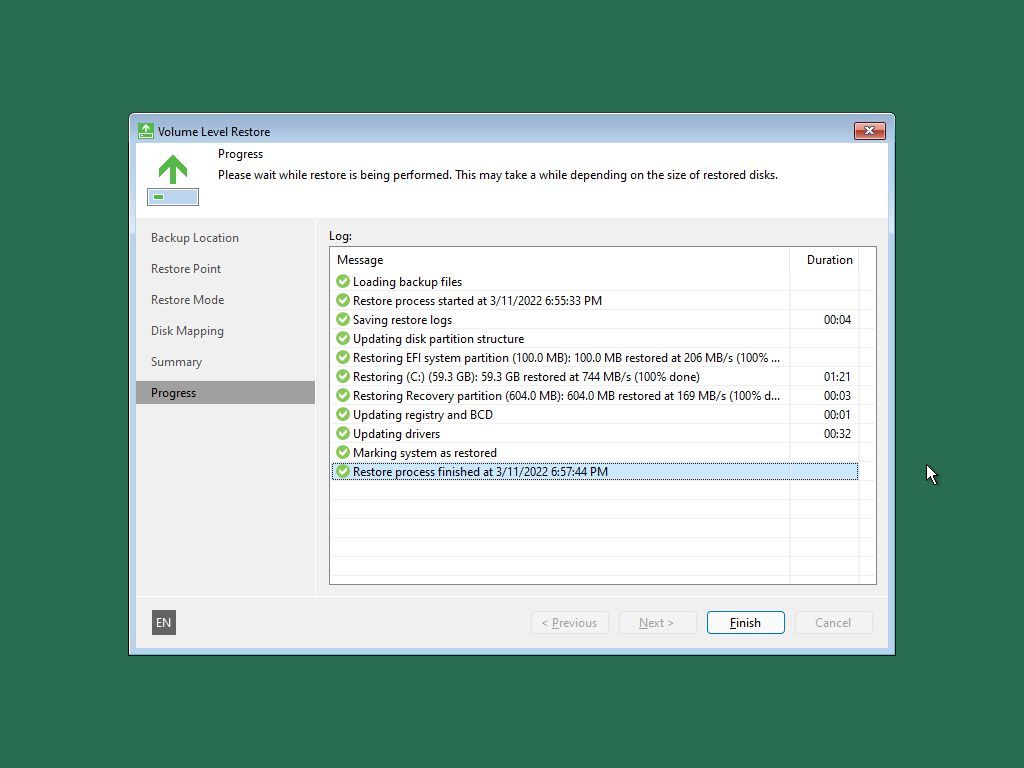
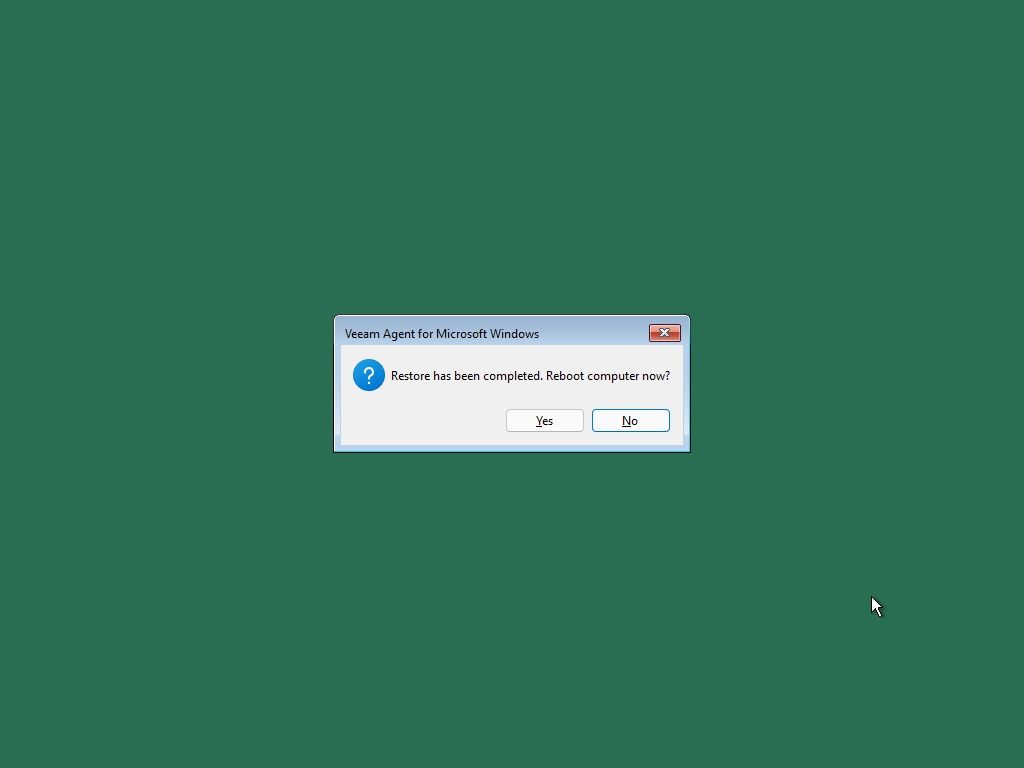
When the process completes, Veeam Agent will ask if you want to reboot your computer. Answer positively, and if everything went according to plan, you’ll soon find yourself looking at a perfectly working version of your OS, just like it was when backed up.
Note that if the cause of the whole ordeal was a failing OS drive, restoring the OS to it will be a temporary solution. As the device further degrades, it’s a given you’ll run into similar problems in the future. If you suspect that’s the case, check our article on signs your hard drive is failing and start preparing for an imminent storage device replacement.
Backups and More Backups
Although we believe Veeam Agent is a much friendlier solution, and better for daily use, it’s also worth looking into dd. Disk Dump, as is its full name, is a Linux tool for cloning disks. “Disks”, though, doesn’t mean only Linux file systems, so, you can use it to backup your Windows installation, too.
Check our article on how to easily clone and restore a Linux Disk Image, and replace the Linux partitions with the ones of your Windows installation.
Even if Veeam Agent works flawlessly, it wouldn’t hurt also taking an occasional full backup with dd. If anything, consider it the equivalent of a secondary parachute. You normally don’t need it, but when you do, you’ll be glad it was there.
Performing an OS Undo With Veeam
After a catastrophe strikes, we begin wondering why we didn’t back up our OSes beforehand. It’s better to take preemptive action now, for this is the “beforehand”. Be prepared, for you can never know when an update or hardware malfunction might decide to ruin your day.
Thanks to Veeam Agent, backing up your OS can be painless and free.
Read Next
About The Author

