
How to Install Google Chrome OS Flex on Your Laptop
Until now, the only way to get an official copy of Chrome OS from Google was to buy one of the company’s popular Chromebooks.
Users that wanted to install the OS on their own existing hardware were left out in the cold, forced to rely on modified, unsupported, and hacked-together versions of Chrome OS that lack functionality and features. Now, with Chrome OS Flex, Google aims to change that.
What Is Chrome OS Flex?
Chrome OS Flex is a new, free version of Chrome OS designed to be downloaded and installed on your existing PC or Mac computer. With its low resource requirements, it is the perfect solution to breathe new life into old hardware that has become too outdated to reliably run current versions of Windows or macOS.
Just like the regular version of Chrome OS that comes installed on Chromebooks, it takes full advantage of all of Google’s cloud computing services such as Gmail, Drive, Docs, etc.
It is important to note that Google is currently distributing Chrome OS Flex as an early access release. This means that while the operating system is more or less fully functional, it is not intended for mission-critical production use. You may run into bugs or experience some instability as the developers continue to develop the software.
The good news, however, is that once you’ve installed Chrome OS Flex on your system, it will automatically update as new versions are released. This means that without any further intervention, you will eventually end up with the fully functional and stable version when it’s completed.
Chrome OS Flex Hardware Requirements
As mentioned above, the hardware requirements for Chrome OS Flex are extremely minimal by today’s standards. In general, Google claims that this new OS will run on almost any computer manufactured after 2010. The specific minimum requirements are as follows:
- Intel or AMD x86 64-bit compatible device
- 4GB of RAM
- 16GB of storage space
- BIOS that supports booting from a USB device
Regarding processor and graphics capabilities, Google states specifically that, “Components made before 2010 might result in a poor experience. Intel GMA 500, 600, 3600, and 3650 graphics hardware do not meet Chrome OS Flex performance standards.”
If the device you are planning to use meets these requirements, it’s time to get started!
To create the installation media for Chrome OS Flex, you will need a computer running Windows or macOS with a current version of the Chrome browser and a USB drive with at least 8GB of storage space. Then, just follow the steps below:
Google warns that from time to time, some USB drives will not function properly with the installer. If you have trouble creating or running the installation media, try a different USB drive. Our first attempt to install Chrome OS Flex failed, but we were able to install the system without any issue by using another USB drive.
To get started, go to Chrome Web Store in your current Chrome browser and install the Chromebook Recovery Utility.

After adding the extension to Chrome, click on the Extensions icon at the top right corner of your browser window and select the Chromebook Recovery Utility from the list that appears. This will start the Chromebook recovery process which will allow you to create a bootable Chrome OS Flex USB drive.
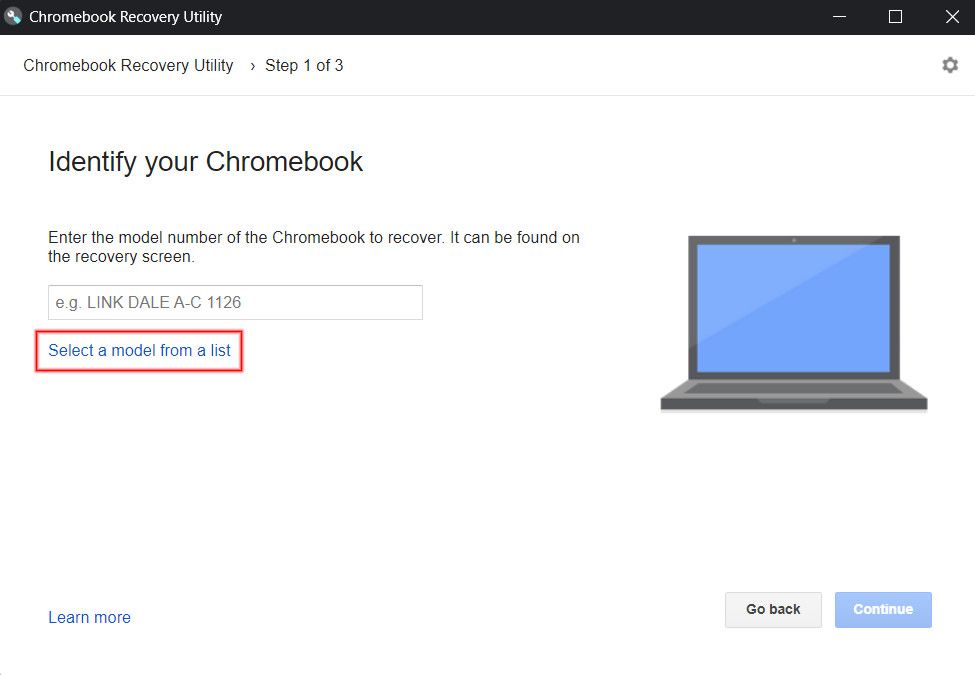
When you start the recovery setup process, the utility will ask you to identify your Chromebook. Click on Select a model from a list.
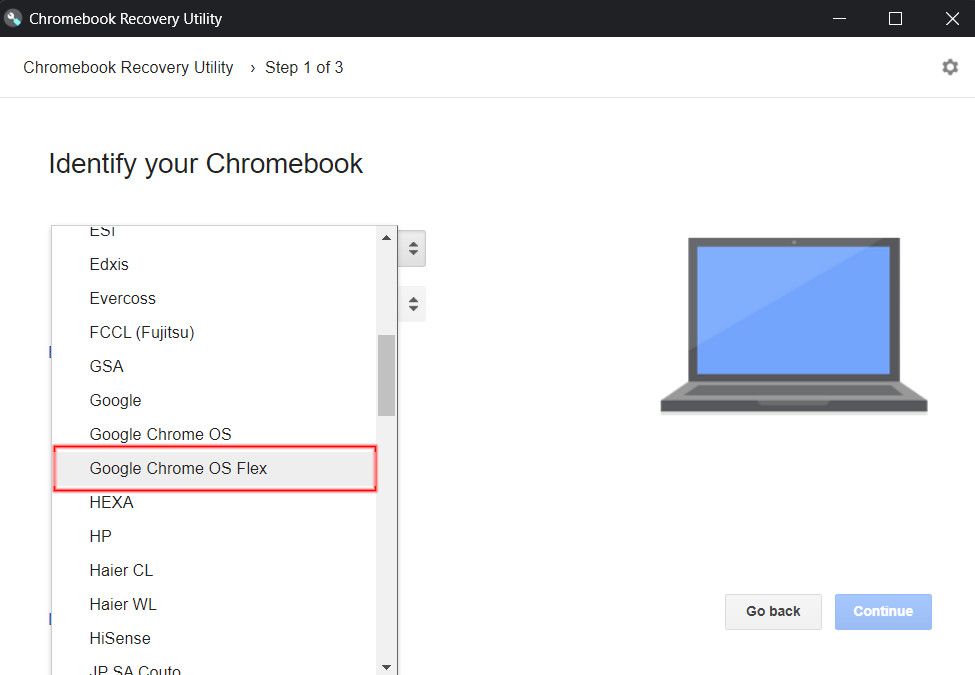
From the list that opens, select Google Chrome OS Flex.
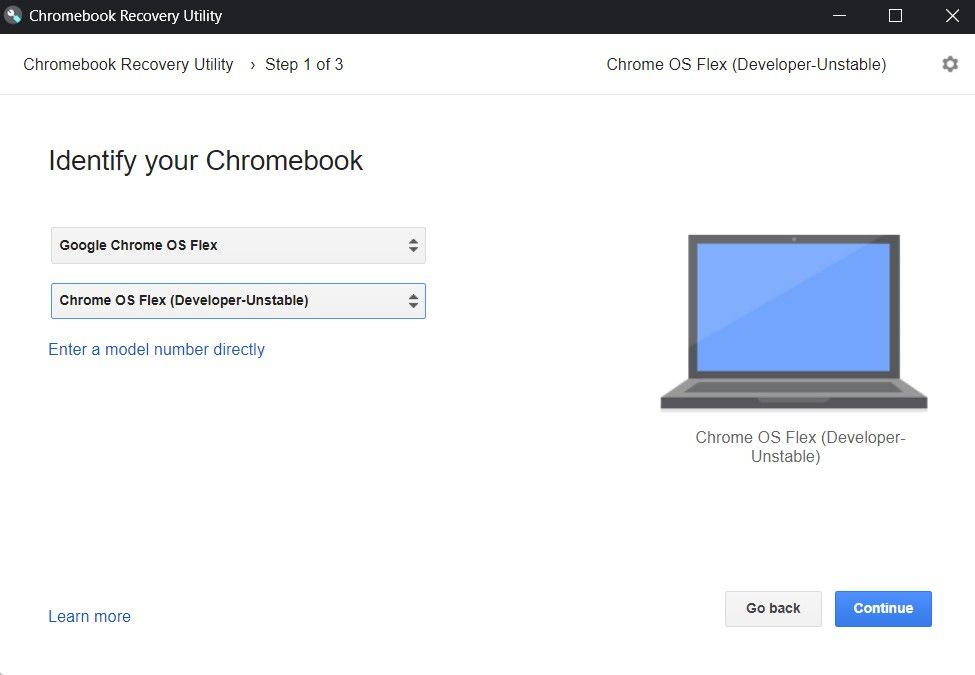
Another drop-down list will appear to allow you to select the version of the OS that you would like to install. At the time of writing, Chrome OS Flex (Developer-Unstable) is the only option.
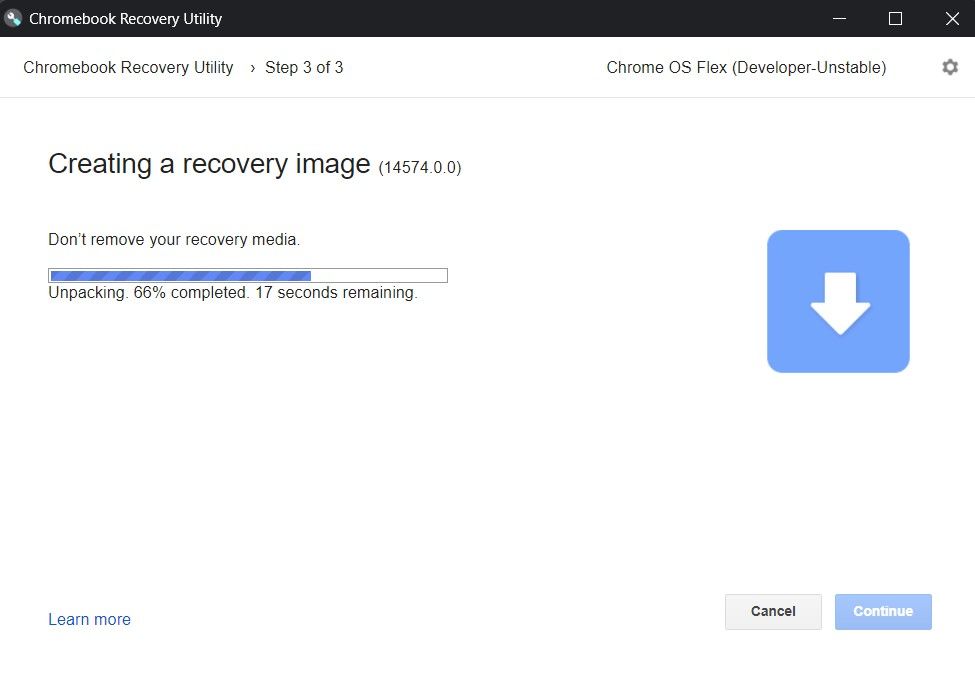
Finally, it’ll ask you to select the USB device where you want to store the recovery image, and the process of downloading and creating the image will begin. Depending on the speed of your internet connection and computer hardware, the process will take anywhere from a few moments to a few minutes.
Once you have created the Chrome OS Flex recovery media, you’ll need to restart your computer with the USB drive connected, enter the BIOS boot menu, and select your USB drive as the boot device. The process for entering the boot menu varies from one manufacturer to another. If you don’t know how to access the boot menu on your system, you should refer to the manufacturer’s support material.
The initial Chrome OS Flex installation screen should load up within a few moments and the installer will ask if you would like to install to the hard drive on your computer or try it from the USB media.
One of the most interesting things about the Chrome OS Flex USB installation media is that it uses persistent storage. Unlike most live USB systems, if you elect to try Chrome OS Flex without installing it to your computer’s hard drive, it’ll save the account you set up and the options that you choose on the USB and use it automatically the next time you boot from the same media. You will still be able to install the system to your device’s hard drive at any time.
Next, it’ll ask you if you’d like to set up your new (or is it old?) Chromebook for yourself or your child. All you need to do is follow the prompts and enter the account information for whichever option you choose. If you choose to set up the device for your child, the installer will give you extra options for setting parental controls.
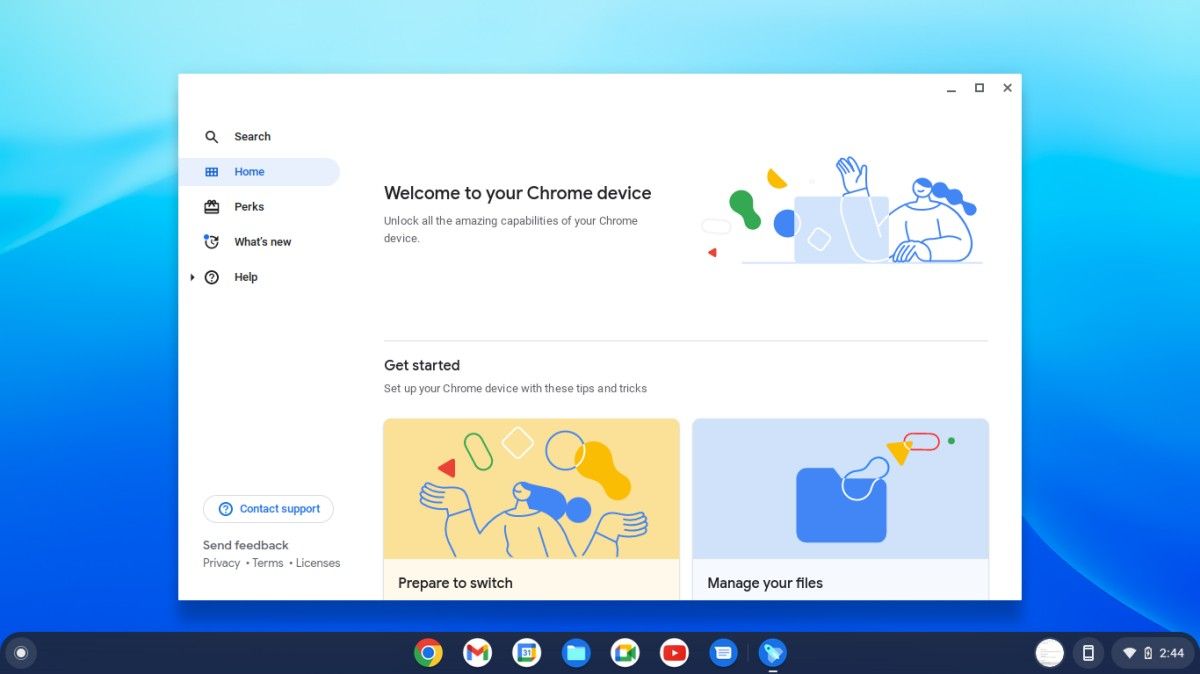
Enjoy the Chromebook Experience on Your PC
Within a few minutes, the installation will finish and Chrome OS Flex will be ready for use. That’s all there is to it. You just turned your computer into a Chromebook. The system will automatically update itself to newer versions of the OS as they become available. There’s nothing left for you to do but explore and enjoy your new Chrome OS Flex system!
Read Next
About The Author

